The Frustrating Reality of Mismatched Sound
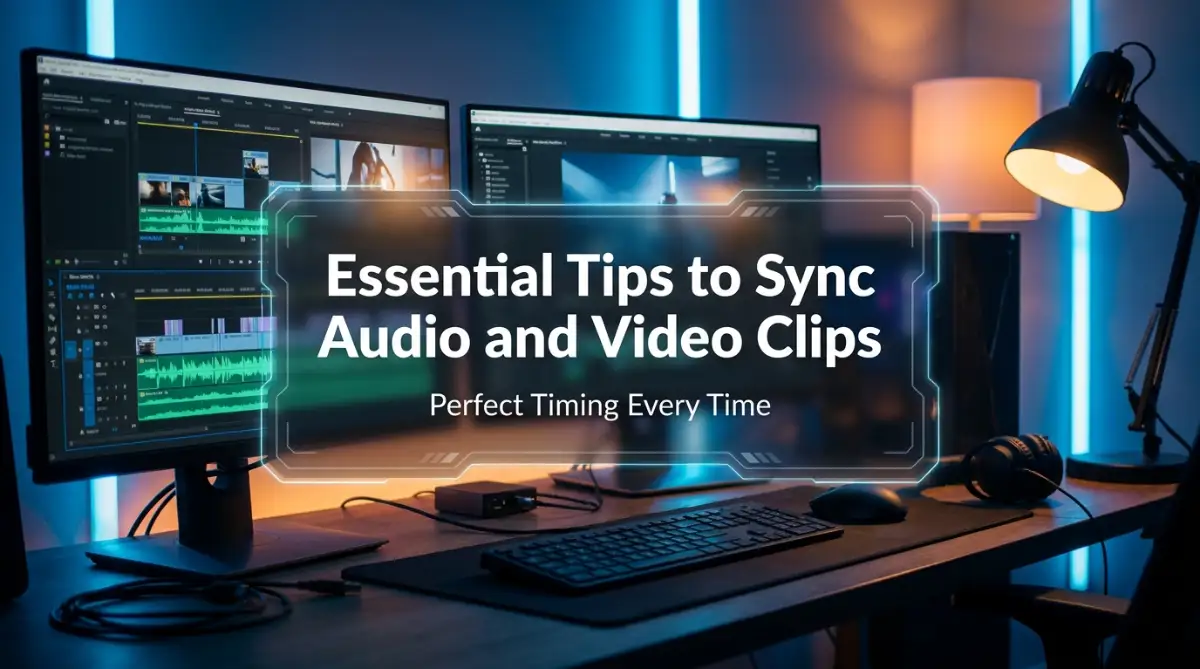
Ever watched a video where the lips are moving, but the words hit your ears a split second later? It is completely unwatchable. You can shoot your video on a $5,000 cinema camera, but if your audio is out of sync, your audience will click away in under five seconds. Getting your picture and sound to lock together perfectly used to drive me crazy. I spent hours dragging audio files left and right, guessing the exact frame. The good news? You don't have to do that. Fixing your mismatched sound is actually pretty easy once you know a few timeline tricks and simple camera settings. Let's fix this annoying problem right now.
What You Will Learn In This Guide:
- The One-Clap Rule: How a simple hand clap saves you hours of manual editing.
- Scratch Audio is Your Friend: Why turning off your camera's terrible built-in mic is a huge mistake.
- Beating Audio Drift: The exact settings (48kHz) to stop your audio from slowing down over time.
- Smartphone VFR Fixes: How to handle annoying iPhone and Android frame rate issues before you start editing.
Mastering the Art of Flawless Sound Alignment
Fixing this problem starts long before you ever open your editing software. Most people think they can just fix everything during the edit, but setting yourself up for success begins on set. Let us look into some incredibly practical habits you can start using today.
The Old School Method That Never Fails
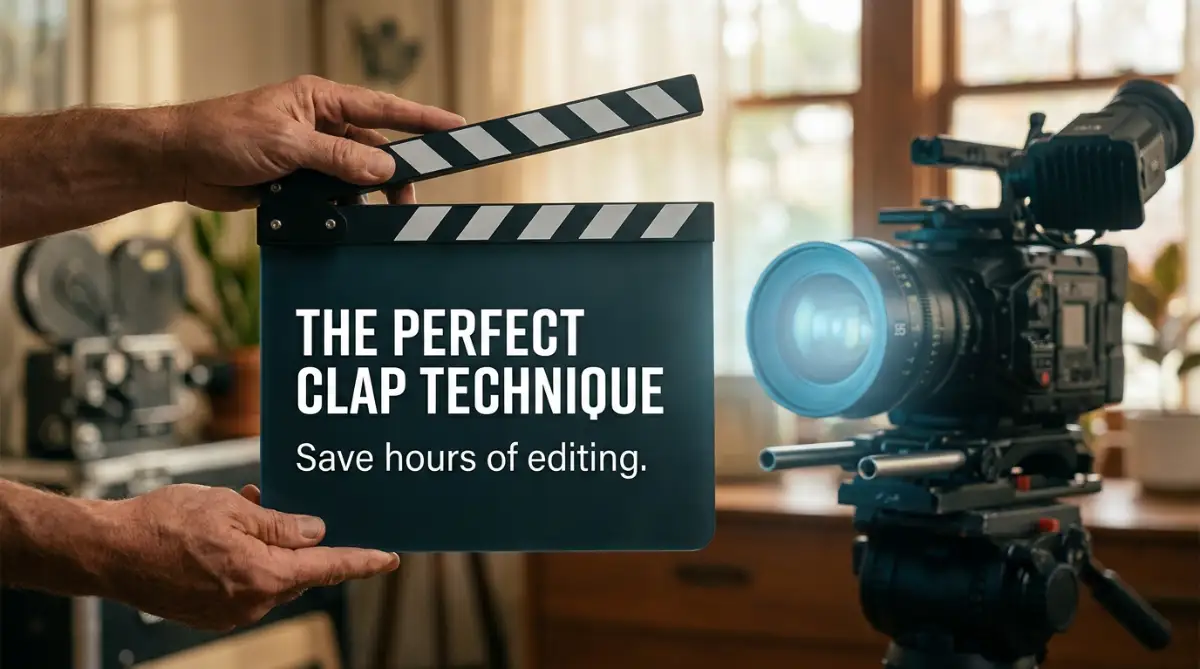
If you watch behind-the-scenes footage of huge movie sets, you will always see someone holding a clapperboard. They do not just do this because it looks cool. That sharp "clap" sound creates a massive, visible spike in your audio waveform.
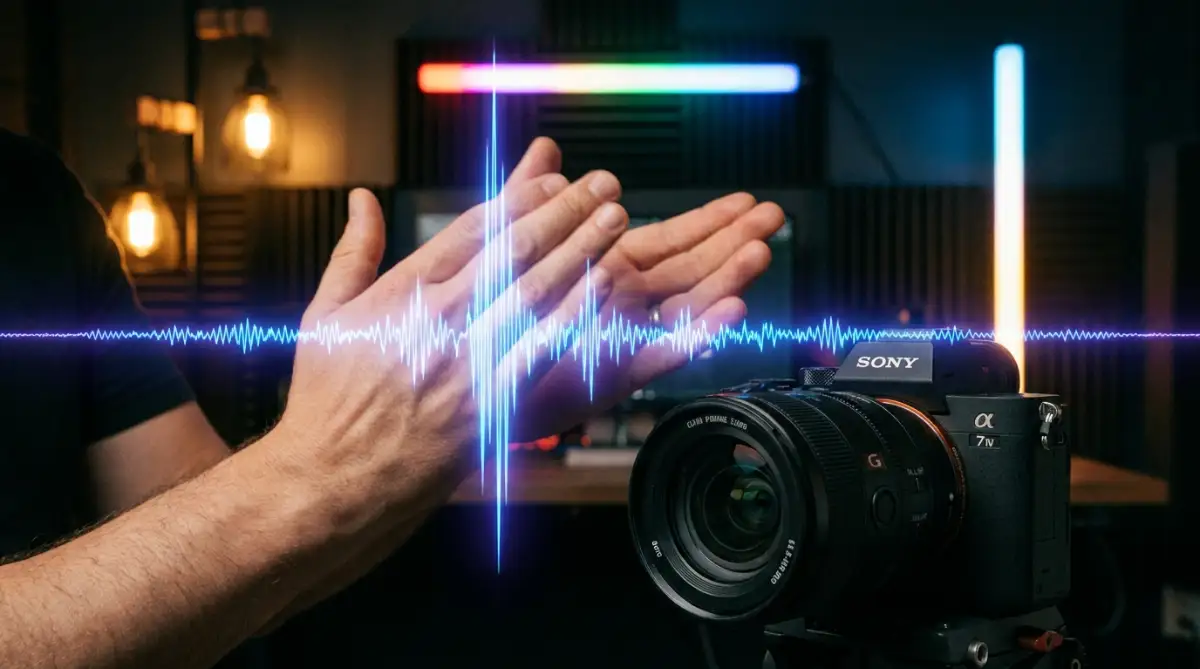
When you start recording, hit record on your camera and hit record on your external audio device. Then, stand in front of the lens, raise your hands so they are clearly visible, and clap loudly one single time. This gives you a clear visual marker (your hands touching) and a clear audio marker (the loud peak).
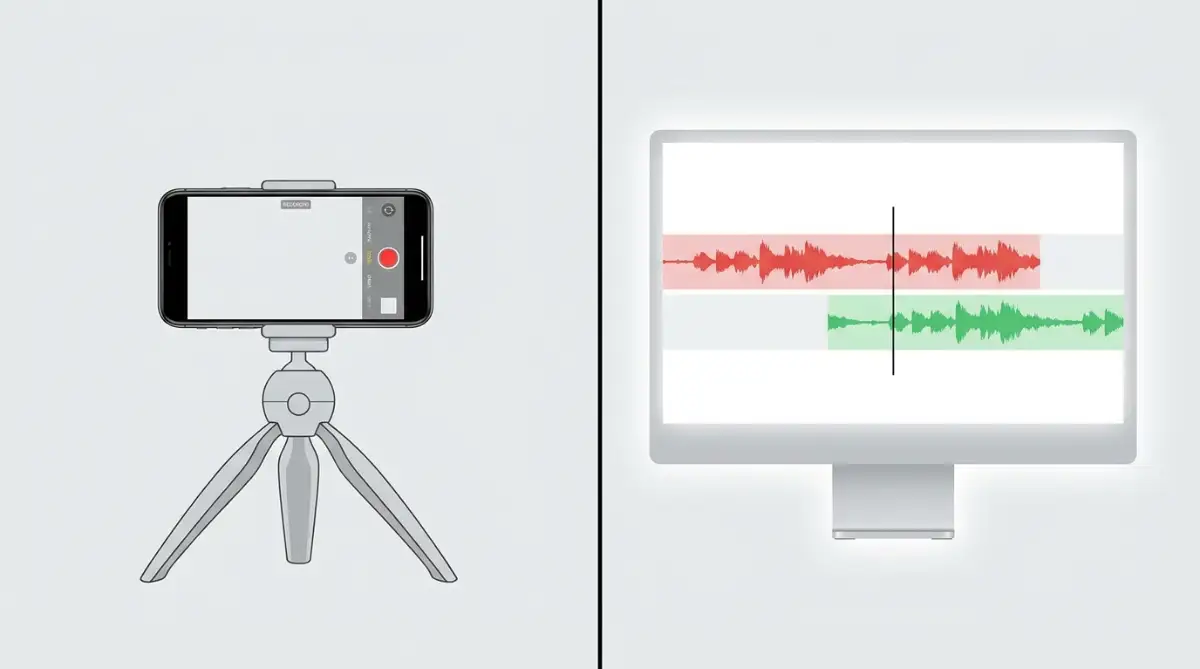
When you bring both files into your software, all you have to do is find the exact frame your hands meet. Then, you simply slide the external audio file until its highest spike lines up exactly with that frame. It is almost foolproof and takes about ten seconds to do.
Here is exactly why this works so well: Visuals operate in frames, while sound operates in milliseconds. Giving your software a single, loud reference point bridges the gap between those two different formats seamlessly.
Pro Tip from My Own Experience: I used to clap three or four times thinking it would give me more reference points. Honestly, that just made my timeline confusing. I quickly realized that one single, sharp, and very loud clap is all you need to perfectly line up your tracks without any guesswork.
Why You Must Keep Scratch Audio On
One of the biggest mistakes beginners make is completely turning off the microphone on their main camera. They think, "Well, I am recording high-quality sound on my external device, so I do not need the camera mic." This is a massive trap.
Your camera's built-in microphone records what we call "scratch audio." It might sound terrible, capturing room echo and wind noise, but you are not going to use it for the final product. You only need it to act as a guide for your good sound file.
When you have scratch audio attached to your video, your editing software can look at the messy sound waves and compare them to your clean sound waves. It acts like a map. Without that map, matching your external file to a completely silent video becomes incredibly difficult.
Want to see exactly how the professionals match these tracks in real-time? Check out this quick and easy visual breakdown that will save you hours of frustration.
Understanding the Silent Killer: Audio Drift
Have you ever lined up the beginning of your video perfectly, only to realize that ten minutes later, the lips are out of sync again? This incredibly annoying issue is called audio drift. It happens when your camera and your sound recorder are keeping time differently.
Think of it like two different clocks running side by side. One clock might be a fraction of a second faster than the other. Over a minute, you will not notice a difference, but over an hour, they will show completely different times.
This usually happens because of mismatched sample rates. Your camera might be recording sound at 48kHz, while your portable recorder is set to 44.1kHz. When you put them on the same timeline, they play back at slightly different speeds.
How to Prevent the Drift Forever
To stop this from happening, you need to dive into the settings menu of both your camera and your recording device before you press record. Make absolutely sure they are both set to the exact same audio sample rate. The industry standard for most video work is 48kHz / 24-bit.
If you make sure both devices speak the exact same language, they will run at the exact same speed. You will never have to chop up your footage and drag it around to fix drifting issues ever again.
Quick Fix Table: Why is my audio drifting?
Manual vs Automated Methods: What Works Best?
When you finally sit down to edit, you have two main choices. You can either align things by yourself using your eyes and ears, or you can let the computer do the heavy lifting. Both methods have their specific time and place.
Here is a quick look at how these two approaches compare in everyday editing situations:
As you can see, you should always know how to do it manually just in case the technology fails. However, for a podcast with three different cameras and four microphones, clicking the auto-sync button will save your sanity.
Sound Syncing: Myths vs. Facts
Taking Advantage of Modern Editing Features
Today, editing platforms are incredibly smart. They use advanced algorithms to analyze the peaks and valleys of your sound waves. When you drop your clips into the media pool, you can highlight the video file and the external sound file together.
By simply right-clicking and selecting the audio synchronization feature, the computer will instantly analyze both files. It looks for matching patterns in the noise. Within seconds, it snaps the high-quality track directly under the video, perfectly in time.
For this to work flawlessly, both files need to have clear, recognizable sound. If your scratch track is nothing but loud wind noise while your external track is a clear voice, the computer will get confused. It needs to hear the same event on both files.
Why Organizing Your Files Changes Everything
One major reason people struggle with this process is a lack of organization. If you dump fifty random video clips and fifty random sound recordings into a folder, you will spend half your day just figuring out which file belongs to which shot.
Good habits start with proper naming. Before you import anything into your project, take five minutes to rename your files. Name them something obvious like "Interview_Wide_Angle" and "Interview_External_Mic".
When everything is neatly labeled, bringing them together on the timeline becomes a smooth, stress-free process. You will never accidentally try to match the sound from clip number five with the video from clip number twelve.
My Personal Folder Structure Cheat Sheet:
If you want to stop losing files, steal my exact folder setup. Whenever I start a new project, I create one main folder with the project name, and inside it, I make these exact four sub-folders:
- 01_Video_Footage (All camera files go here)
- 02_External_Audio (Your high-quality mic recordings)
- 03_Assets (Background music, graphics, and logos)
- 04_Project_Files (Where your actual editing software file lives)
Dealing with Variable Frame Rates from Smartphones
If you are shooting videos on a smartphone, you might run into a very unique synchronization nightmare. Smartphones often use something called Variable Frame Rate (VFR) to save storage space. Instead of recording a steady 30 frames every single second, the phone might drop down to 24 frames if nothing is moving, and jump up to 60 frames during fast motion.
Professional editing programs hate Variable Frame Rates. They expect a constant, steady stream of pictures. When you put a VFR video next to a steady external sound file, they will never stay aligned. The video will constantly speed up and slow down compared to the sound.
To solve this, you need to run your smartphone footage through a free converting software before you start editing. You want to convert that file into a Constant Frame Rate (CFR). Once it is converted to a steady speed, it will match your external recorder perfectly from beginning to end.
The Final Quality Check
Before you export your final video, you must perform a dedicated quality check. Do not just watch the video for color and transitions. Close your eyes and just listen for a moment.
Then, open your eyes and specifically watch the subject's lips. Play the video back at normal speed, and then maybe watch a section at half speed. Look for hard consonant sounds like 'P', 'B', or 'M'. These letters require the lips to close completely.
If you hear the 'P' sound before the lips actually touch, your track is out of alignment. Zoom into your timeline as far as it will go. Nudge the sound track one single frame to the left or right until that 'P' sound happens exactly when the lips close.
Taking these extra few minutes to double-check your work makes a massive difference in how professional your final product looks. Your audience might not know exactly why your video feels so high-quality, but they will definitely feel the difference. Good synchronization is invisible when done right, but it is glaringly obvious when done wrong.
Next-Level Workflows for Perfect Sound Matching
Once you master the basic clapping technique, you might want to level up your entire production process. If you are handling large projects with multiple cameras, relying solely on manual methods will slow you down. You need systems that work behind the scenes to keep your files organized and perfectly aligned.
Let us look into some highly effective strategies that professional editors use every single day. These methods will help you maintain a flawless timeline, even when you are dealing with hours of heavy footage.
The Magic of Timecode Systems
If you want to completely automate your workflow, you need to understand Timecode. Think of Timecode as a highly specific digital clock that constantly runs in the background of your recording devices. It stamps a unique, invisible number on every single frame of your video and every split second of your sound.
When you attach a small Timecode generator to your camera and another one to your audio recorder, they talk to each other. They make sure both devices share the exact same digital clock. You can learn more about how the industry regulates these signals through the SMPTE timecode standards to understand why professionals rely on them so heavily.
When you bring these files into your computer, the software simply reads the digital stamps. It instantly snaps everything together with mathematical perfection. You do not even need scratch sound for this to work perfectly.
Reading Waveforms Like a Professional
Sometimes, the automated tools will fail you, and you will have to rely on your eyes. Learning how to read sound waves on your timeline is an incredibly valuable skill. You should stop looking at them as random squiggly lines and start seeing them as visual representations of speech.
Hard consonant sounds, like a "T" or a "K", create very sharp, straight lines in the waveform. These are called transients. When you are trying to manually align two files, always look for these sharp spikes instead of the wide, messy blocks of sound.
Vowels like "O" or "A" create long, rounded waves that are very hard to pinpoint on a frame-by-frame basis. By matching the sharp spikes first, you guarantee a much tighter alignment. This deep understanding of how software algorithms process data will save you hours of unnecessary guessing.
The Phasing Test for Absolute Accuracy
Even when your clips look perfectly matched on the screen, they might still be off by a few milliseconds. There is an amazing trick you can use to check for absolute perfection. It involves listening to both your scratch track and your high-quality track at the same time.
Turn the volume up on both tracks and play them back together. If they are perfectly aligned, the voice will sound incredibly loud and clear. However, if they are slightly misaligned, the sound will become thin, robotic, and echo-like.
Audio engineers call this issue "phasing," and it happens when two identical sound waves cancel each other out. If you want to dive deeper into the science of sound design, you can explore the audio phasing principles used in music production. If you hear that robotic echo, simply nudge one track left or right until the voice sounds natural again.
Handling Massive Multi-Camera Shoots
Managing a podcast with three different angles and four separate microphones can easily turn into a nightmare. If you try to align all of these pieces one by one, your brain will quickly become overwhelmed. The secret to handling big projects is using nested sequences or multi-cam groups.
First, gather all the clips from Camera A, Camera B, and Camera C, along with your main audio file. Highlight all of them together in your media bin. Right-click and choose the option to create a multi-camera source sequence using sound as the synchronization point.
The software will analyze everything at once and pack it neatly into one single, clean clip. You can then edit this combined clip exactly like a live television broadcast. Exploring advanced digital media creation tools can introduce you to features specifically designed for these complex workflows.
Building a Long-Term Organizational Habit
The real secret to long-term success is not just knowing the right buttons to push. It is about creating a strict, repeatable habit every time you sit down at your desk. You should create a master folder template on your hard drive that you copy for every new project.
Inside this template, have dedicated folders named "Camera Video", "External Audio", "Graphics", and "Exports". Before you even open your editing program, put your freshly recorded files into their proper homes. This simple act removes the chaos and keeps your brain focused on creativity.
When your workspace is clean, the computer runs faster, and your files link together without any missing media errors. A messy folder structure is exactly like dealing with bad lighting setups; no amount of editing magic can fix a fundamentally broken foundation.
Heartbreaking Errors That Will Ruin Your Edit
There is nothing quite as painful as returning from a long, exhausting day of shooting only to realize your footage is compromised. Many creators learn these lessons the hard way, often at the expense of a paying client or a massive audience. Let us walk through the most devastating mistakes people make, so you never have to experience that sinking feeling in your chest.
The Silent Scratch Track Disaster
Imagine you just finished recording a breathtaking documentary interview. You sit down with a warm cup of coffee, open your timeline, and realize your video file is completely silent. You forgot to turn on the built-in microphone on your main camera.
Now, you have a beautiful video file and a pristine external sound file, but absolutely no map to connect them. The automated sync button is grayed out, and your hands begin to sweat. You are now forced to spend the next five hours watching the speaker's lips, guessing where every sentence begins.
This single mistake can cause you to miss an important deadline and completely destroy your client's trust. Always check your camera meters before you hit record. You can also review basic digital sampling theories to understand why having two references is an absolute necessity for modern workflows.
The Off-Screen Clapping Trap
A clapperboard is a brilliant tool, but only if you use it correctly. I see so many beginners hit the record button, stand behind the camera, and loudly clap their hands. They capture the loud sound, but the camera never actually sees the physical impact.
If the lens cannot see your hands coming together, the loud noise is completely useless to you. You have the sound spike, but you have no visual frame to match it against. This completely defeats the entire purpose of the manual slating technique.
Always step directly in front of the lens. Make sure your hands are well within the frame, check your framing settings, and clap where the camera can clearly see it. This guarantees you will always have a physical point of reference.
Trusting Wireless Bluetooth Monitors
Monitoring your sound on set is a great habit, but using the wrong gear will severely hurt your project. Many new creators try to use wireless Bluetooth earbuds to listen to their camera's output while filming. This is a very dangerous game to play.
Bluetooth technology inherently has a slight delay. When you watch a person speaking live and listen through wireless earbuds, your brain registers a lag. You might panic, thinking your equipment is broken, and stop the shoot to fix a problem that does not actually exist.
This unnecessary panic wastes valuable production time and frustrates your on-screen talent. Always use high-quality, wired studio headphones when monitoring live shoots. A physical cable provides a zero-latency connection, letting you hear exactly what the machine is recording in real-time.
Ignoring the Smartphone Frame Rate Curse
Many amazing creators start their journey using just their smartphones. However, they often skip learning about the technical side of mobile video files. As mentioned earlier, smartphones use shifting speeds to save battery and storage space.
If you just drop raw mobile footage onto a professional timeline, the sound will slowly drift away from the picture. You might try chopping up the video every ten seconds to pull it back into place, but this ruins the natural flow. It creates a choppy, uncomfortable viewing experience that feels incredibly amateur.
You must take the time to process mobile footage before editing. Ignoring this step is just like ignoring blurry visual outputs; it instantly cheapens your entire brand. Taking an extra ten minutes to convert your files will save you days of absolute misery. You can review variable frame rate documentation to see exactly how these files differ from standard video formats.
Trying to "Fix it in Post"
The most dangerous phrase in the creative industry is "we will just fix it in post." Relying on software to magically rescue sloppy production habits is a guaranteed path to burnout. If you record in a noisy room without clapping, expecting the computer to sort it out, you will be deeply disappointed.
When your foundation is messy, you spend all your creative energy just making the video watchable. You lose the time you should have spent adding cool graphics, color grading, and finding the perfect background music. Your final product becomes mediocre simply because you were lazy on set.
Do not rely on the software to cover up mistakes. Fix the issues at the source, just as you would carefully handle fixing visual errors step-by-step rather than ignoring them. A disciplined approach on set leads to an incredibly joyful and fast editing experience.
My 1-Minute Pre-Shoot Checklist
Before you even touch that record button, run through this quick list to save yourself a massive headache later:
- Did I turn the camera’s built-in microphone on (just for scratch audio)?
- Are my camera and my external mic both set to 48kHz?
- Am I wearing wired headphones to monitor the sound without delay?
- Did I stand right in front of the lens and clap loudly one time?
Your Blueprint for Stress-Free Video Projects
Bringing your picture and sound together does not have to be a tear-inducing struggle. It all comes down to building a simple, reliable routine that you follow every single time you press record. When you respect the technical rules of production, the creative side becomes completely effortless.
Start treating your external sound files with the exact same respect you give your expensive camera lenses. Make sure your settings match, always capture a loud reference noise, and keep your project folders beautifully organized. These small, daily habits separate the frustrated beginners from the highly paid professionals.
Once you get into the habit of doing these things, your confidence will skyrocket. You won't feel nervous about setting up three different cameras or using a fancy new microphone. Instead of stressing out over broken audio files, you get to spend your editing time doing the fun stuff—like picking awesome background music, adding cool text animations, and actually telling a great story.
I know exactly how overwhelming the editing screen can look when nothing seems to align properly. But I promise you, by applying just one or two of these techniques today, your next project will feel incredibly smooth. I learned these lessons the hard way so you do not have to, and I am genuinely excited for you to experience this seamless workflow.
Common Questions About Flawless Synchronization
Why does my sound drift out of place after exporting the final video?
This usually happens because the timeline frame rate in your editing software does not match your original video files. Check your export settings and make sure they mirror your source footage exactly. Also, ensure you are not accidentally exporting at a variable speed.
Can I match my files if I completely forgot to use a clapperboard?
Yes, you absolutely can, but it requires a bit of detective work. Look closely at the video for sharp, sudden movements, like a door slamming or a coffee cup hitting a table. You can use that specific impact point to match the loudest spike on your audio track.
Does adding heavy video effects cause the sound to lag behind?
Heavy visual effects require massive computer processing power, which can cause your playback monitor to stutter. Your video might look out of sync while editing, but it is actually just your computer struggling to play it live. Try rendering your timeline effects first, and the playback will likely match up perfectly again.
Is it better to use third-party plugins instead of built-in timeline tools?
For simple one-camera shoots, your built-in editing tools are more than powerful enough. However, if you regularly shoot massive weddings or podcasts with five different cameras, specialized synchronization plugins will save you hours. They handle massive amounts of data much faster than standard editing programs.
How do I fix bad synchronization on an already published video?
Unfortunately, once a video is live on a platform, you cannot simply swap the audio track behind the scenes. You have to go back to your original project file, fix the timeline alignment, and export a brand new file. You will then need to delete the old post and re-upload the corrected version.
Disclaimer: The information provided in this article is for educational and informational purposes only. Software interfaces, features, and hardware specifications may change over time. Always test your equipment and workflows on short test clips before applying them to critical professional projects. We are not responsible for any data loss or project delays that may occur during your editing process.
THANK YOU