The Hidden Frustration of Creating AI Art
Staring at a distorted, six-fingered AI monster instead of the masterpiece you actually asked for? Yeah, it sucks. You type out the perfect prompt, hit generate, and get a blurry mess that makes zero sense. I used to spend hours fighting with these tools, thinking I lacked some secret artistic skill. But here is the truth—fixing this does not require coding skills or magic formulas. It just takes a simple shift in how you talk to the machine. Let me show you how to stop guessing and start creating exactly what you see in your head.
A large part of this frustration stems from how we approach the tool itself. Far too many creators fall into the trap of relying on sheer guesswork instead of taking a moment to understand how generative models actually process information. If your daily experience with AI art feels like a constant, exhausting game of hit-or-miss, there are usually a few specific culprits behind the scenes.
What You Will Learn in This Guide (Key Takeaways):
- Stop guessing: Why throwing random words at the AI ruins your images.
- The Layering Trick: A simple 3-step formula (Subject + Environment + Style) to get exactly what you want.
- Weighting words: How to force the software to pay attention to your most important details.
- Hidden traps: The common sizing and lighting mistakes that instantly make AI art look fake.
Here is why your prompts might not be delivering the results you want:
- Relying on Vague Instructions: The most common mistake is giving the AI too much creative freedom. Short, weak descriptions force the model to fill in the blanks, which rarely aligns with your original vision.
- Overlooking Technical Parameters: AI does not see the world the way human artists do. It interprets order, artistic style, and shadows mathematically. In fact, neglecting these elements is one of the biggest lighting mistakes you must avoid if you want professional-looking results.
- Falling for the "Magic Code" Myth: The internet is flooded with terrible advice suggesting you need overly complex, secretive codes to generate good art. This echo chamber of misinformation only leads to more confusion.
- Overcomplicating the Prompt: On the flip side, beginners often try to cram every possible descriptive keyword into a single, breathless sentence. This does not help; it merely scatters the model’s focus, which is a major reason why your AI images look blurry and how to fix them fast.
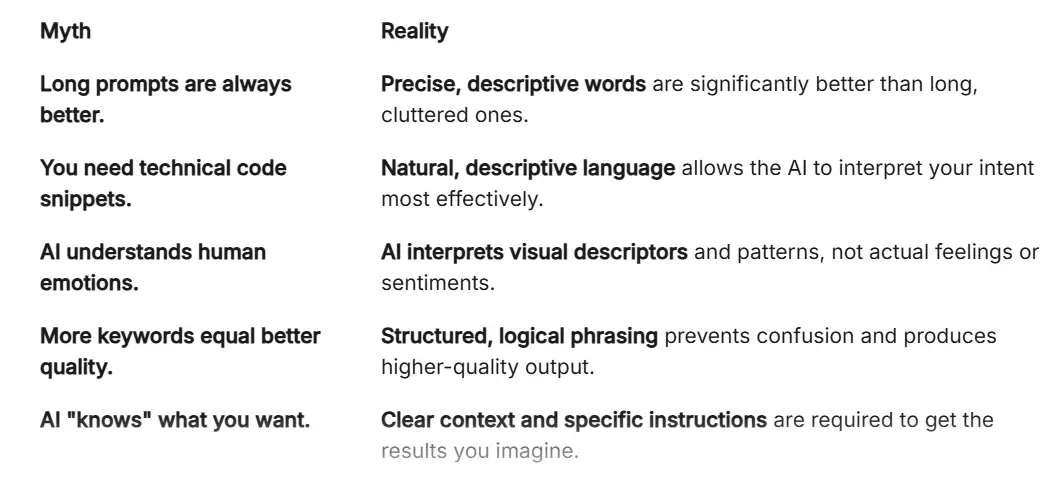
Quick Reality Check: AI Prompting Myths vs. Facts
This endless cycle of trial and error is much more than just a minor annoyance—it actively drains your creative energy. Over time, dealing with poorly generated outputs, like trying to fix deformed AI hands and faces, can take a severe toll on your motivation.
- Loss of Creative Confidence: You might eventually start to believe that you are simply not "good" at AI art. In reality, your imagination is fine; the software just needs better, more structured instructions.
- Creator Burnout: Spending hours rendering dozens of variations, only to drag them all straight to the trash bin, is deeply exhausting.
- Mental Fatigue: The constant pressure to pivot, rewrite, and tweak your prompts inevitably leads to decision paralysis.
- Wasted Time: Instead of actually producing the beautiful work you enjoy, you end up wasting precious hours battling software misinterpretations.
When you finally start treating the AI as a collaborative partner that requires highly logical, step-by-step guidance, your results will instantly shift from random noise to intentional, stunning art. You absolutely do not need to be a computer scientist or a seasoned programmer to master this workflow.
You just need a solid grasp of the foundational mechanics, specifically the science behind your image prompts. Once you stop viewing your prompt as a magical wish and start seeing it as a detailed blueprint for a digital architect, your previous frustrations will transform into boundless creative power.
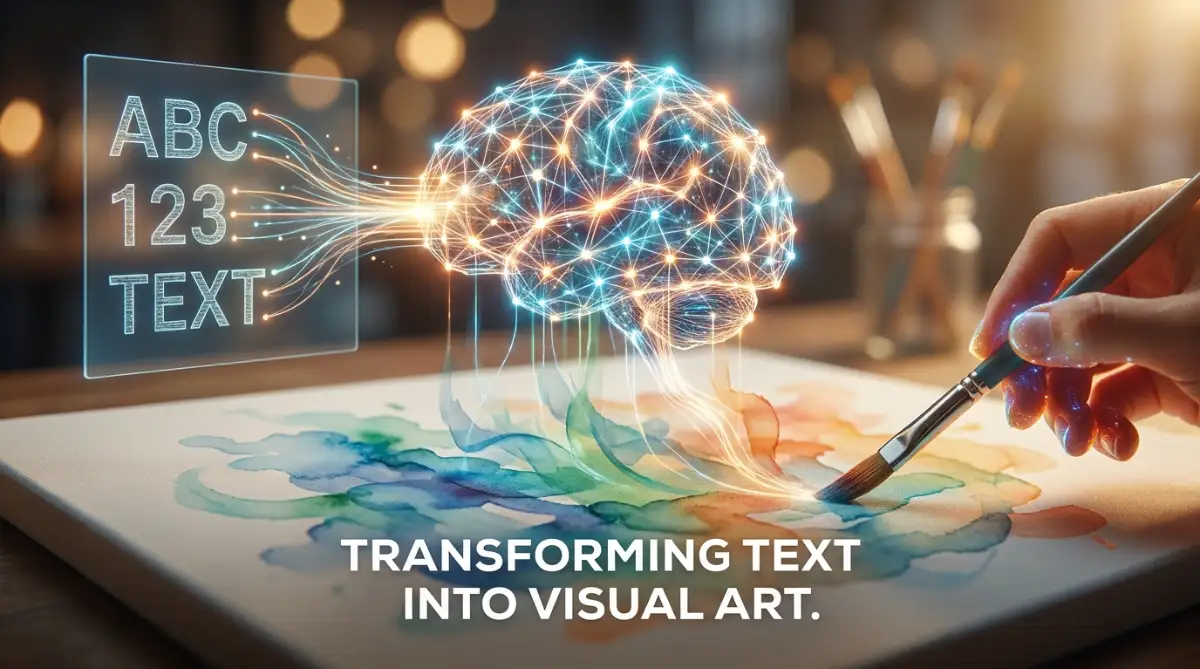
If you are a visual learner, watch this quick video below to see exactly how these prompt secrets work in real time, and then keep reading to learn the simple formula I use to get perfect images every single time.
Decoding the Engine: How AI Sees Your Words
To get great images, you must understand that the AI does not "see" your prompt the way you do. It does not understand beauty, meaning, or emotion. Instead, it relies on statistical relationships learned from billions of image-text pairs. When you type "A cat," the AI looks at its massive internal map and says, "Based on my data, this is what a cat usually looks like."
Step 1: The Principle of Contextual Anchoring
The AI starts building an image by identifying your primary subject first. If you type "A golden retriever sitting in a park," the system prioritizes "Golden Retriever." It anchors the entire generation process around this core concept.
- The Pro Tip: Place your most important subject at the very beginning of your prompt.
- Why it works: The AI devotes the most "memory" and focus to the first few words of your request.
- Example: "A vintage pocket watch on a wooden table" will yield much more consistent results than "On a wooden table, there is a vintage pocket watch."
Step 2: The Art of Adding Descriptive Modifiers
Once the subject is anchored, the AI looks for modifiers to define the style and mood. These are your adjectives and stylistic nouns. If you just ask for a "House," the AI will pick a default style. If you ask for a "Victorian mansion at sunset, oil painting style," you have given it specific boundaries.
Think of modifiers as the camera settings for a photographer. You are telling the AI the "lighting," the "angle," and the "texture" of the image.
Step 3: Controlling the Compositional Balance
This is where many users fail. They forget that the AI needs to know how things relate to each other in space. Do not just list items. Describe the relationship between them.
Instead of saying "Dog, tree, sun," try saying "A dog sitting under a large oak tree during a golden hour sunset." This creates a scene. The AI now knows the dog is positioned relative to the tree, and the light is coming from the sun. This relational structure is the secret ingredient for professional-looking AI generation.
See the Difference: Structure in Action
If you want to see how much structure matters, look at this quick breakdown of a bad prompt versus a professional one:
For a long time, my biggest mistake was just throwing a bunch of random words together and hoping the machine would figure it out. Once I realized I needed to tell the AI exactly where to put things, like a director setting up a movie scene, my images finally started looking exactly how I wanted.
Expert Insight: The Layering Method
Think of your prompt in three distinct layers:
- The Subject: What is the main focus?
- The Environment: Where is it?
- The Style: How should it look?
If you build your prompt in this specific order every time, you will immediately notice a higher success rate. For instance, "A futuristic astronaut (Subject) standing on a red planet (Environment) in the style of 1970s sci-fi concept art (Style)." This flow is logical, easy for the AI to parse, and ensures you get exactly what you want.
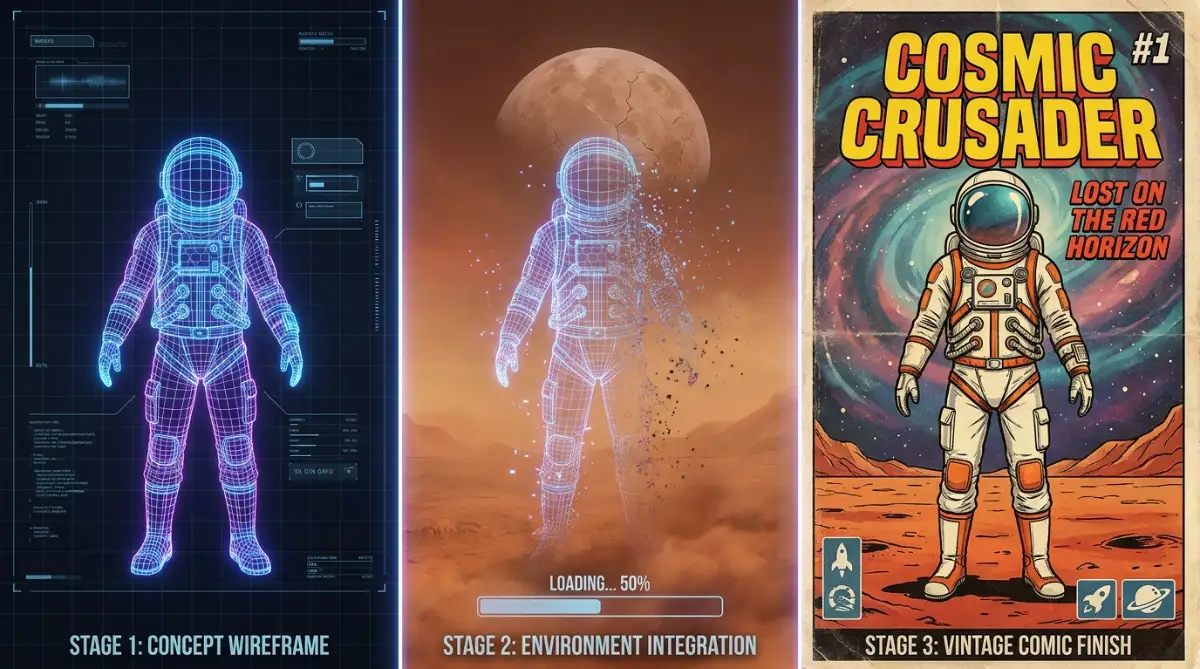
Stop treating prompts like a random list of words. Start treating them like a short, descriptive story. When you give the AI a clear subject, a setting, and a style, you take full control of the output. The technology is not as complex as it seems once you learn to speak its language. You have the power to create professional visuals today simply by being more intentional with your words. Keep experimenting with this structure, and watch how your digital creations change for the better.
Getting the Small Details Exactly Right
Once you understand the basics of prompt architecture, it is time to move beyond simple descriptions. To achieve professional results, you must learn to "weight" your prompts. This means giving specific emphasis to certain elements over others within the software.
The Power of Token Weighting and Emphasis
Most advanced AI image tools allow you to assign importance to specific words. When you place a word in parentheses or add a multiplier, the machine pays closer attention to that part of your request. This helps when you want a specific detail, like a "glowing blue neon light," to dominate the scene.
Think of this like a conductor leading an orchestra. You decide which instruments—or in this case, visual elements—should be louder. By emphasizing key subjects, you prevent the AI from defaulting to average, blurry, or generic outcomes.
- Adjusting Emphasis: Use brackets to signal importance. For instance, (detailed facial features) tells the engine to prioritize that specific area.
- The Weighting Effect: If the AI ignores your request for "vintage clothing," add weight to that phrase. You are effectively guiding the software's internal math toward the result you actually want.
Achieving Visual Consistency Over Time
One of the biggest hurdles creators face is mastering AI character consistency across different images. If you create a hero character but it changes its appearance in every new generation, your work lacks professional cohesion.
To fix this, you need to use consistent style seeds and descriptive anchor tags. Describe your character’s features with extreme precision, such as "sharp jawline, emerald eyes, messy blonde hair."
If you find this overwhelming, it helps to use the perfect text prompt formula that breaks down every visual variable. By keeping a "prompt library," you save your most successful descriptions to reuse them later. This builds a brand identity for your digital art.
Why Iteration Beats Perfection
Never expect a perfect image on your first attempt. Even expert prompt engineers go through ten or twenty variations before finding the one that fits their vision.
Treat the first attempt as a draft. If the light is too dim, add "bright studio lighting" to your next prompt. If the angle is too close, change it to "wide shot, cinematic view."
By treating the process like a real-life photography shoot, you remain calm and creative. The AI is a tool, and you are the director. Directing is a skill that improves with every single click of the "generate" button.

Quick Troubleshooting: Why Do My Images Still Look Bad?
Even with a great prompt, things can go sideways. Here are the most common problems I run into and how you can fix them instantly:
Q: Why does my AI character have six fingers and weird eyes?
A: You forgot your negative prompts! You have to explicitly tell the software what not to do. Always add phrases like "no extra fingers, no distorted faces, no blurry details" in your negative prompt box to keep things clean.
Q: Why does my cinematic shot look like a tiny, square Instagram post?
A: You are ignoring the aspect ratio. By default, the AI gives you a square. If you want a wide, movie-like shot, you must type "16:9" at the end of your prompt. Want it for a phone screen? Use "9:16".
Q: Why is my image super messy and confusing?
A: You are overloading the system. If you ask for a "futuristic cyberpunk city in a medieval watercolor style with a dinosaur," the AI simply gets confused. Pick one clear style and stick to it.
Q: The picture looks okay, but it feels lifeless. What did I miss?
A: Lighting. Lighting changes everything. Do not let the AI guess. Tell it you want "warm morning sunlight," "moody cinematic shadows," or "bright studio lights." This one trick changes the whole mood of your art.
Your Path Forward as a Digital Creator
You are now equipped with more than just basic knowledge. You have a structural understanding of how your words shape the digital canvas. Every prompt you write is a chance to refine your unique creative voice.
Your Pre-Flight Prompt Checklist
Before you hit that generate button, ask yourself these quick questions:
Action Plan for Tomorrow
- Start Small: Choose one specific style, such as "oil painting" or "photorealistic portrait," and generate five variations.
- Document Success: Keep a simple document of the prompts that worked well.
- Analyze Failures: When an image looks bad, identify exactly which word might have caused the confusion.
This process is a marathon, not a sprint. If you feel frustrated, step away and come back with a fresh perspective. You are building a new skill set that is changing the world of digital design.
Trust the process, keep your prompts logical, and remember that you are the architect of your own visuals. The machine provides the paint, but you provide the vision. Go ahead and start creating your first masterpiece today .
When I look back at my first awful AI images, I just have to laugh because getting better really only took a little patience and a simple shift in my thinking. I promise that if you stick with it and use these simple steps today, you will be amazed at the beautiful art you can build.
Disclaimer: This content is for educational and informational purposes only. The information provided is based on current trends in artificial intelligence and does not guarantee specific results. Always review the terms of service of the AI platforms you use to ensure compliance with their usage policies.
***THANK YOU***