How to Clean Up Bad Audio and Remove Background Noise (Without an Expensive Studio)
Let's skip the dramatic backstory. You are reading this because your audio sounds terrible, and it is driving you completely crazy. Maybe a loud ceiling fan ruined your best podcast take, or a neighbor's dog decided to bark right in the middle of your video presentation. The good news? You do not need to drop thousands of dollars on a fancy soundproof booth to fix it. Let's get straight into the exact tricks you can use to clean up your messy tracks right now, using tools you probably already have.
Quick Takeaways: Clean Your Audio in Minutes
- Fix the room first: Turn off fans, close windows, and use heavy blankets to stop room echo before you even press record.
- Get closer to the mic: Keep your microphone just 3 to 5 inches away from your mouth so your voice overpowers the background noise naturally.
- Use a Noise Gate: Set up a basic noise gate in your software to automatically silence your track whenever you stop talking.
- Let AI handle the rest: Use smart AI isolation tools for tough sounds like dogs barking or random street traffic, but always use a light touch to keep your voice natural.
Why Bad Sound Happens (And How We Can Beat It)
Before we start fixing things, we need to understand our enemy. Background noise comes in a few different shapes and sizes. Once you know what type of sound is ruining your track, getting rid of it becomes incredibly simple.
The most common issue is continuous noise. This is that annoying, steady hiss, hum, or buzz that never stops. It usually comes from computer fans, air conditioners, or cheap microphone cables.
Then, we have sudden, irregular noises. These are the random sounds that happen out of nowhere. Think of a door slamming, someone coughing, or a dog barking loudly. These are slightly harder to remove because they mix directly with your speaking voice.
Finally, there is room reverb or echo. If you record in a room with bare walls and hard floors, your voice bounces around like a rubber ball. This makes you sound like you are talking from inside a deep bathroom cave.
The First Line of Defense: The Noise Gate
One of the easiest and most effective tools you can use is called a Noise Gate. You can find this tool in almost every basic editing software available today. Think of a noise gate as a strict bouncer at a nightclub door.
The bouncer only lets sounds pass through if they are loud enough to meet a specific requirement. When you are speaking directly into the microphone, your voice is loud, so the gate opens and lets your voice through. But when you stop speaking to take a breath, the sound drops to a low level.
The noise gate notices this drop and immediately slams the door shut. This completely mutes the low-volume background hum of your ceiling fan or computer while you are silent. It is a brilliant way to make your audio sound instantly cleaner.
Watch This Quick Visual Guide on Setting Up a Noise Gate
Setting up a noise gate might sound technical, but it only takes a few clicks once you see it in action. Check out this amazing short video below where an expert shows you exactly which sliders to pull to instantly silence room noise without cutting off your words.
When setting up your gate, you just have to be careful with the "Threshold" setting. If you set the threshold too high, the gate might chop off the beginning or end of your words. You want to adjust it gently until the background hiss disappears during your silent pauses.
Shaping Your Voice with Simple Equalization (EQ)
Once you have gated the background silence, the next step is using an Equalizer, or EQ. An EQ allows you to adjust specific frequencies in your audio track. Think of it like adjusting the bass and treble on your car stereo, but with much more control.
Most background rumbles, like traffic outside or a low humming fridge, live in the very low-frequency areas. Your actual speaking voice does not really use these super low frequencies. By using a tool called a "High-Pass Filter" in your EQ, you can simply cut out all those low, muddy sounds.
This simple move instantly removes the low rumble of the street without hurting your voice at all. It makes your track sound instantly lighter and more professional. You can also slightly lower the extreme high frequencies to get rid of sharp, electronic hissing sounds.
Here is a lesson I learned the hard way. When I first discovered EQ tools, I went completely crazy and cut out way too many frequencies trying to remove a fan noise. My voice ended up sounding thin, metallic, and completely robotic, ruining the entire track anyway. Always make small, gentle adjustments with your EQ rather than huge, sweeping cuts.
Letting AI Do the Heavy Lifting for You
Sometimes, manual tools like gates and EQs are just not enough. If someone drops a heavy book right while you are speaking, those sounds mix directly together. In the past, saving that audio clip was almost impossible.
Today, smart software completely changes the game. AI vocal isolation tools are designed specifically to recognize what a human voice sounds like. They have been trained by listening to millions of hours of human speech.
When you feed your messy audio into one of these smart tools, it scans the entire track. It easily separates your vocal sounds from everything else in the background. It then pulls your voice forward and completely deletes the unwanted noises, even if they happen at the exact same time you are talking.
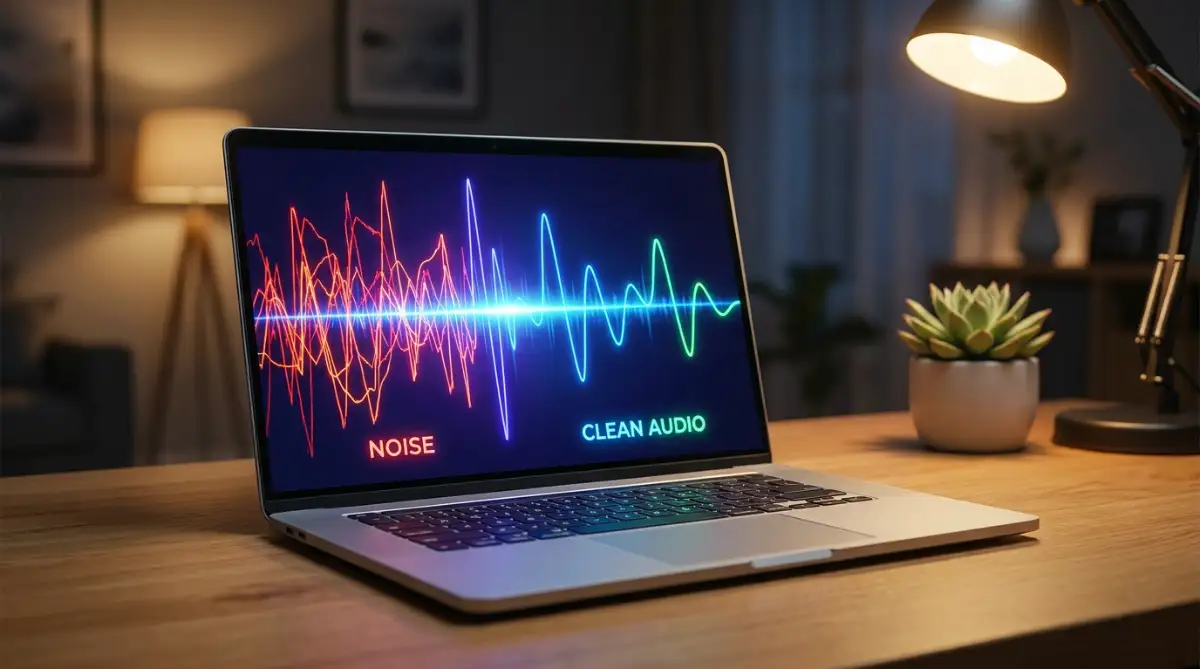
This process feels like actual magic the first time you see it work. You can take a recording made on a windy street next to a construction site, run it through the software, and it comes out sounding like a studio recording. The technology literally rebuilds your voice while rejecting the chaos.
The "Filter" Approach to Built-in Noise Reduction
If you do not want to use external AI tools, most standard editing programs have a built-in "Noise Reduction" effect. This process usually works in two simple steps. First, you have to find a few seconds of "pure silence" in your recording.
This means you find a part of the track where you are not talking at all, but the bad background noise is clearly playing. You tell the software to "Learn" this specific noise profile. The program analyzes the exact frequencies of that annoying hum or hiss.
In the second step, you select your entire audio track and apply the effect. The software now acts like a smart water filter. It knows exactly what the "dirt" looks like because you showed it the noise profile earlier.
It strips that specific dirt out of your entire recording, leaving only your clean voice behind. This method is incredibly powerful for consistent, steady sounds like air conditioners or old computer hard drives. Just be careful not to apply the effect too strongly, or your voice might sound like it is underwater.
Fixing the Problem at the Source
While software is amazing, the absolute best way to clean your audio is to record it properly in the first place. This sounds obvious, but skipping simple physical steps is why most people struggle later. Prevention is always better than trying to fix a broken file.
Before you hit the record button, just sit quietly in your room for sixty seconds. Close your eyes and actively listen to your environment. You will be shocked at how many sounds your brain usually ignores.
Do you hear the air conditioner? Turn it off for the next twenty minutes while you record. Is the window slightly open? Close it tight to block the neighborhood birds. Doing this simple environmental check saves you hours of frustrating editing work later.
Microphone Placement Changes Everything
How you position your microphone makes a massive difference in how much background noise you capture. Most beginners place their microphone two or three feet away from their mouth on a desk. This is a huge mistake.
When the mic is far away, you have to turn up the recording volume to capture your voice. Turning up the volume also turns up the sound of everything else in the room. The echo, the computer fan, and the chair squeaks all become super loud.
Instead, bring the microphone very close to your mouth. You should be about three to five inches away from the microphone grill. When you are this close, your voice is incredibly loud and clear.
Because your voice is so loud, you can actually turn the recording volume down. This naturally pushes all the background room noise down into silence. Your voice becomes the absolute focus, and the room fades away automatically.
Quick Guide: How Microphone Distance Changes Your Sound
Taming the Echo in Your Room
As we discussed earlier, empty rooms create terrible echo. Hard surfaces like bare walls, wooden floors, and glass windows reflect sound perfectly. You need to soften your environment to absorb those bouncing sound waves.
You do not need to buy expensive acoustic foam to do this. Your home is already full of heavy, soft materials that absorb sound perfectly. Thick blankets, pillows, and heavy winter coats are amazing acoustic treatments.
If you are recording a voiceover, try doing it inside your clothes closet. The hanging clothes surround you and instantly absorb all the bouncing sound waves. It creates a beautiful, dead-quiet space that rivals professional vocal booths.

If you cannot sit in a closet, just throw a thick blanket over your head and your microphone. It might look a little bit silly, but the audio results will be absolutely mind-blowing. The blanket blocks the room echo entirely, giving you a rich, warm, and intimate vocal track.
The Power of Dynamic Microphones
If you are constantly struggling with background noise, you might be using the wrong type of equipment. Many people buy USB condenser microphones because they are popular and easy to find. However, condenser microphones are designed to be extremely sensitive.
They are meant to pick up every tiny detail in a quiet recording studio. If you use one in an untreated bedroom, it will pick up a car driving down the street three houses away. For noisy environments, a dynamic microphone is a much better choice.
Dynamic microphones are designed to reject background sounds. They only pick up audio that is right directly in front of them. Radio broadcasters and live stage singers use dynamic mics precisely because they ignore the noisy environment around them.
Switching your equipment can solve half of your problems before you even touch a computer. It allows you to focus strictly on your message rather than worrying about a dog barking outside.
Next-Level Audio Secrets the Professionals Keep Hidden
Now that we have covered the basic tools, it is time to step up your editing game. Professionals do not just click a single button to clean their tracks. They use a few smart, hidden techniques to make everything sound incredibly natural.
One of the biggest secrets in the audio industry is something called "Room Tone." When beginners cut out a bad sound, they usually leave a gap of pure digital silence. This creates a highly unnatural, jarring drop in the audio that listeners notice immediately.
Instead of total silence, professionals always record thirty seconds of quiet room noise before they start speaking. They use this soft, natural background sound to fill in any empty gaps in their edit. If you want to dive deeper into this concept, you can read more about recording field audio and room tone from broadcast experts.
Using room tone makes your edits completely invisible to the audience. The listener simply hears a smooth, continuous environment. It feels completely natural, exactly like sitting in the same room with you.
Another major pro tip is learning to use multiple, gentle layers of software instead of one aggressive filter. Think about how a painter creates a masterpiece with hundreds of gentle brush strokes. If you try to remove all the background noise in one massive swipe, you will destroy the quality of your voice.
Instead, apply a very light noise reduction filter first to take the edge off. Then, use a gentle EQ to cut out the remaining low-end rumble. Layering effects this way keeps your voice sounding rich and deeply human. It is the exact same logic you use when decoding generative AI prompts; you build the perfect result step by step, rather than forcing everything at once.
The Psychology of Perfect Sound
We also have to understand how our listeners consume our content. People mostly listen to videos and podcasts on their smartphones or with standard wireless earbuds. These devices naturally boost extreme high and low frequencies, making background noise even more annoying.
Because of this, you should always test your final audio mix on a cheap pair of headphones or your phone speaker. Do not just rely on your expensive studio monitors. If your voice sounds clean on a basic smartphone, it will sound absolutely amazing everywhere else.
Creating a consistent sound profile is another massive secret to long-term success. Once you find the perfect EQ and noise reduction settings for your specific room, save them as a preset template in your software. You should not have to reinvent the wheel every single time you sit down to edit.
Having a template saves you hours of frustrating work and guarantees a professional result every single time. It is very similar to how you must master AI character consistency to build a recognizable brand. Consistency builds massive trust with your audience because they always know they will get high-quality content from you.
If you are serious about upgrading your physical space, start paying attention to the hard surfaces around your desk. Placing a thick rug on a wooden floor absorbs more echo than a hundred dollars worth of cheap foam panels. Understanding these simple principles of room acoustics will naturally improve your raw recordings instantly.
The Dangerous Traps of Over-Editing Your Voice
Even with the best intentions, people constantly make huge mistakes when trying to clean up their tracks. Fixing bad audio is a very delicate process. If you push things too far, you end up doing much more harm than good.
The most common trap is creating the dreaded "underwater robot" effect. When people discover a noise reduction slider, they get excited and crank it all the way up to one hundred percent. Yes, the background hiss disappears completely, but their voice suddenly sounds like a cheap sci-fi movie robot bubbling under a swimming pool.
This robotic artifacting is incredibly painful to listen to. Actually, most audiences would prefer to hear a little bit of background air conditioner hum rather than a heavily distorted, artificial voice. Knowing how to fix deformed AI hands teaches us that trying to fix something digitally can sometimes make it look—or in this case, sound—much worse if done incorrectly.
Another massive mistake is called "recording too hot." Many creators are terrified of being too quiet, so they turn their microphone volume to the maximum level. When you speak loudly, the audio signal hits the top of the meter and breaks, causing permanent distortion.
This harsh, crackling sound is called clipping, and there is almost no software on earth that can fix it perfectly. It is always better to record your voice at a medium, safe volume and gently boost it later in your editing software. You can learn proper microphone gain and placement techniques to ensure you never ruin a great take again.
Myth vs. Fact: Fixing Distorted Audio
- The Myth: You can just use an AI tool or a heavy EQ plugin to fix clipping and make a loud, distorted recording sound normal again.
- The Fact: Clipping actually destroys the digital data of your voice. Once that data hits the limit and breaks, it is gone forever. You can hide it a little bit, but you can never truly fix a blown-out audio track. Always record a bit quieter than you think you need to!
Stop Trying to Fix Everything in Post
Perhaps the most dangerous mindset for any creator is thinking, "I will just fix it in post." This lazy approach to recording will destroy your workflow and your mental health. Software is meant to polish a good recording, not perform a miracle on a terrible one.
If your neighbor is using a loud lawnmower outside, do not press record and pray the AI tools will save you. Just take a break, grab a cup of coffee, and wait ten minutes for the noise to stop. Forcing a bad recording situation always leads to a terrible final product.
This relates perfectly to visual content creation as well. Just like avoiding lighting mistakes is the foundation of a beautiful image, controlling your environment is the foundation of great audio. You have to respect the physical recording process first.
Finally, do not completely remove the breath sounds from your voiceover. Many beginners zoom in and carefully delete every single time they take a breath. This leaves you sounding completely unnatural, like a machine that never needs oxygen.
Breathing is a natural part of human speech and emotion. Instead of deleting your breaths, just gently turn their volume down by a few decibels. This keeps the emotion in your voice completely intact while removing any distracting gasps for air.

Your Game Plan for Crystal Clear Sound Starting Today
We have covered a lot of ground today, but improving your sound does not have to be overwhelming. You do not need to buy expensive new gear immediately or spend weeks reading thick technical manuals. You just need to follow a few simple, thoughtful steps every time you sit down at your microphone.
Start by taking full control of your recording environment. Close your windows, turn off the fans, and throw a heavy blanket over any hard surfaces near your desk. The quietest room always wins, no matter what software you are using.
Next, focus entirely on your microphone placement. Bring it just a few inches away from your mouth so your voice naturally overpowers any remaining background hum. This single physical adjustment will instantly cut your editing time in half and make you sound incredibly professional.
When you do move into your editing software, remember the golden rule of moderation. Use your noise gates gently, cut out the low rumble with a simple EQ, and let the smart tools handle the complicated stuff. If your audio starts sounding muddy, learn about audio repair fundamentals to understand exactly where you pushed the sliders too far.
If you are ever struggling with poor quality media, whether it is audio or visual, remember that almost everything can be improved with patience. Just like you can learn why your AI images look blurry and fix them, you can easily train your ears to spot bad sound and fix it quickly.
Before you hit that final export button in your editing software, you need to pick the right audio format. This is a step where many beginners get confused and end up ruining their perfectly clean audio by saving it incorrectly. Here is a quick cheat sheet I always use:
Always save your main project as a WAV file first, just to be safe!
You can always explore our main homepage for more smart digital solutions and creator tips. The goal is to build a workflow that feels effortless, allowing you to focus purely on creating amazing content.
I know how incredibly frustrating it is to deal with bad audio right before a big deadline. But I promise you, once you apply these simple tricks, you will never stress out about an air conditioner hum again. You have got this, so go hit that record button with absolute confidence today!
Questions I Always Get About Cleaning Up Sound
Can I remove background noise completely for free?
Yes, you absolutely can achieve great results without spending a dime. Popular free software like Audacity has excellent built-in noise reduction and EQ tools. There are also many free AI-powered web tools that can instantly clean your voice tracks with just a single click.A great example you can try right now is the free Adobe Podcast AI Enhancer, which does an amazing job at cleaning up background noise directly in your web browser.
Why does my voice sound muffled after editing?
This happens when you apply noise reduction effects way too aggressively. The software gets confused and starts cutting out the natural high frequencies of your actual voice. Try undoing the effect and applying it again at half the strength for a much clearer result.
Is recording in a quiet room better than using expensive software?
A quiet, well-treated room will beat expensive software every single time. Software can only guess what your voice is supposed to sound like, which sometimes leads to robotic artifacts. Capturing clean audio at the source keeps your voice completely rich, natural, and full of emotion.
Do I need a professional microphone to sound good?
Not necessarily, but the right type of microphone helps massively. A cheap dynamic microphone placed very close to your mouth will reject room noise beautifully. It will often sound much cleaner than a highly sensitive, expensive studio condenser microphone in an untreated bedroom.
Can AI tools really fix completely ruined audio files?
Modern AI tools are incredibly powerful and can remove barking dogs, sirens, and wind noise that were impossible to fix a few years ago. However, if your original voice is deeply distorted or clipping, even the smartest AI cannot perfectly rebuild it. Always try to record the cleanest possible take first.
Disclaimer: The tips and software recommendations provided in this blog post are for educational and informational purposes only. Audio editing results may vary depending on your specific hardware, room environment, and the severity of the original background noise. We are not responsible for any permanent loss of audio quality or data during your editing process. Always remember to make a safe backup copy of your original audio files before applying any noise reduction effects or permanent changes.