The Frustrating Reality of Giant Media Files
You finally finished editing your video, hit export, and suddenly your computer tells you the file is 15 gigabytes. Sound familiar? We have all been stuck staring at a slow progress bar, terrified our internet will drop before the upload finishes. The worst part is trying to figure out why a simple 10-minute talking video ended up larger than a full-length movie.
But here is the good news: shrinking that massive file down to a fast, web-friendly size is actually pretty simple. You do not need a degree in computer science to fix this. Once you understand a few hidden settings inside your editing software, you can cut your export times in half and save your hard drive from overflowing. Let me show you exactly what to click.
Quick Fixes to Shrink Your Next Export:
- Lower the Bitrate: Switch from CBR to VBR and lower your target numbers. This is the fastest way to drop file weight.
- Use Delivery Codecs: Always choose H.264 or H.265 instead of heavy editing formats like ProRes.
- Stop Fake 4K: Export at the exact resolution and frame rate you originally recorded in.
- Check the Timeline Trash: Zoom out to ensure no stray audio or hidden graphics are sitting at the end of your video.
The Hidden Technical Culprits Behind Your Massive Exports
Let us break down exactly what is happening inside your editing software. You might think that a ten-minute video should always be the exact same size. However, the length of your video is actually the least important factor when it comes to the final file weight.
It is the hidden settings running in the background that pump up your file size. We need to look closely at the specific choices you are making when you click that final render button.
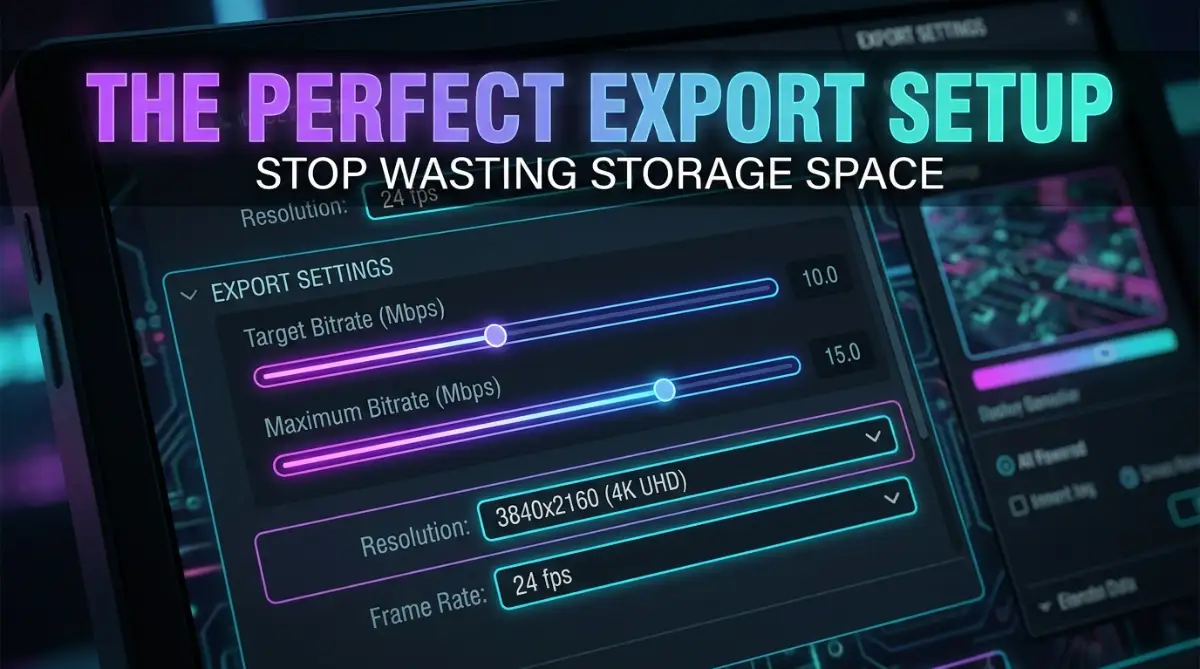
The Data Rate Monster (Understanding Bitrate)
If you want to know the main reason your videos are huge, look directly at your bitrate. Bitrate is simply the amount of data your computer processes every single second to show the video. Think of it like a water hose in your garden.

If you turn the faucet on just a little bit, a small stream of water comes out. If you open it all the way, a massive flood of water rushes through. A high bitrate is like that wide-open faucet. It pushes an enormous amount of data into your file every single second.
Most beginners leave their software on the default "Match Source" or "High Quality" settings. These automatic presets often crank the bitrate up to completely unnecessary levels. For a simple talking-head video, a massive bitrate does not make the video look any better. It only makes the file incredibly heavy and impossible to manage.
There are generally two types of bitrate settings you will see in your software. The first is Constant Bitrate (CBR), and the second is Variable Bitrate (VBR). CBR forces the software to use the exact same amount of data every single second, even if the screen is just completely black.
VBR is much smarter. It uses a lot of data when there is fast movement on the screen, like a sports game or an action scene. But when the scene is still and quiet, it drops the data rate down automatically. Switching from CBR to VBR can instantly chop your file size in half without ruining how the video looks.
Cheat Sheet: My Go-To Bitrate Settings for YouTube
If you are confused about exactly what numbers to type into your software, copy this simple chart. I use these exact variable bitrate (VBR) targets to keep my files small while staying crisp:
The Pro Tip for Instant Relief
Here is something I learned the hard way after filling up three external hard drives in a single month. Always do a tiny five-second test export of the most visually complex part of your video. I test different bitrate sliders on just that short clip to see how low I can push the numbers before the video starts looking blurry. This simple habit saves me hours of rendering time and keeps my files incredibly small.
Watch This Quick Visual Breakdown
If you are still confused about how these settings interact, this excellent visual guide will make everything click perfectly.
The Language Your Video Speaks (Choosing the Right Codec)
Another massive trap people fall into is using the wrong codec. A codec is basically the software that compresses and decompresses your video data. Think of it like packing a suitcase for a long vacation.
If you just throw all your clothes into the bag randomly, you will need a huge suitcase. But if you carefully fold and vacuum-seal everything, you can fit the same amount of clothes into a tiny carry-on bag. A good codec is like a master packer.
When you export a video using formats like ProRes, DNxHD, or uncompressed AVI, you are choosing not to pack your clothes at all. These formats are designed for Hollywood studios working on massive movie theater screens. They are meant to preserve every single pixel of data for professional color grading.
They are absolutely not meant for uploading to social media or sending via email. If you try to upload a ProRes file, your browser will likely crash because the file is so outrageously large.
To fix this, you need to use delivery codecs. The most popular and reliable option is H.264. It has been around for a long time and is accepted by almost every platform on the internet. It compresses your video beautifully, making the file small while keeping it crisp.
An even better option is H.265 (also known as HEVC). This is a newer, smarter codec that packs your data even tighter. H.265 can give you the exact same visual quality as H.264, but at half the file size.
Myth vs. Reality: The Resolution Trap
- The Myth: Exporting everything in 4K resolution is the only way to look professional on the internet today.
- The Reality: The vast majority of people watch videos on their tiny mobile phone screens while sitting on the bus or waiting in line.
Quick Myth-Buster: The 4K Quality Trap
- The Myth: If I export my 1080p video in 4K, YouTube will automatically make it look like a Hollywood movie.
- The Fact: Your editing software cannot magically create details that your camera never saw. Upscaling a 1080p video to 4K just stretches out the existing pixels and fills the empty space with useless data. Your file gets four times heavier, but the visible quality stays exactly the same. Be honest with your footage!
Resolution is simply the physical dimensions of your video frame. A 4K video has four times as many pixels as a standard 1080p HD video. That means your computer has to save four times as much information for every single frame.
If you are shooting a beautiful nature documentary to show on a massive television, 4K makes sense. But if you are recording a quick tutorial for social media or a simple review video, 4K is completely overkill. Your viewers literally will not be able to tell the difference on their phones.
By simply dropping your export resolution from 4K down to 1080p, you instantly remove a huge chunk of data. Your upload speeds will skyrocket, and your viewers will still get a beautifully clear image. Do not let the pressure to have the highest numbers ruin your workflow.
The Frame Rate Dilemma
Frame rate, measured in frames per second (FPS), is how many individual pictures your camera takes in one second to create the illusion of motion. Standard movies are shot at 24 frames per second. This gives them that classic, cinematic, slightly blurry look we are used to seeing in theaters.
Many modern cameras and phones default to shooting in 60 frames per second. This makes the video look incredibly smooth, which is great for fast-paced video games or sports. However, a 60 FPS video literally contains more than double the number of pictures compared to a 24 FPS video.
If you are just sitting in a chair talking to the camera, you do not need 60 pictures taken every second. That extra data is just sitting there, doing nothing but making your file heavier. Changing your export settings to 24 or 30 FPS is a quick and painless way to drop unnecessary weight.
You must remember that every single setting multiplies the final result. If you combine 4K resolution, 60 frames per second, and a high bitrate, you are creating a digital monster. Balancing these three elements is the secret to a perfect export.
Do Not Forget the Audio Overload
We spend so much time worrying about the picture that we completely ignore the sound. Audio can actually take up a surprising amount of space if it is not handled correctly. Uncompressed audio formats, like PCM or WAV, are fantastic while you are actively editing your project.
They give you the cleanest sound possible to mix and equalize. But once you are ready to deliver the final file to the internet, leaving the audio uncompressed is a mistake. It adds completely unnecessary megabytes to your final total.
You should always make sure your audio export settings are set to AAC format. AAC provides excellent sound quality that is practically indistinguishable from the original to the human ear. A standard audio bitrate of 320 kbps is perfectly fine for almost any project you will ever make.
Hidden Timeline Trash
Sometimes, the reason your file is huge has nothing to do with your export settings at all. It is actually about what you left sitting on your editing timeline. Video editing software can be very stubborn and literal.
If you accidentally drop a tiny audio clip twenty minutes past the end of your actual video, the software does not care. It will render all twenty minutes of that black screen just to include that one stray clip. This adds a massive amount of empty data to your final file.
Always zoom out on your timeline before you hit the export button. Check carefully to make sure there are no leftover graphics, stray clips, or invisible adjustment layers hiding at the end. Setting strict 'In' and 'Out' points around your actual content guarantees that the software only renders exactly what you want it to.
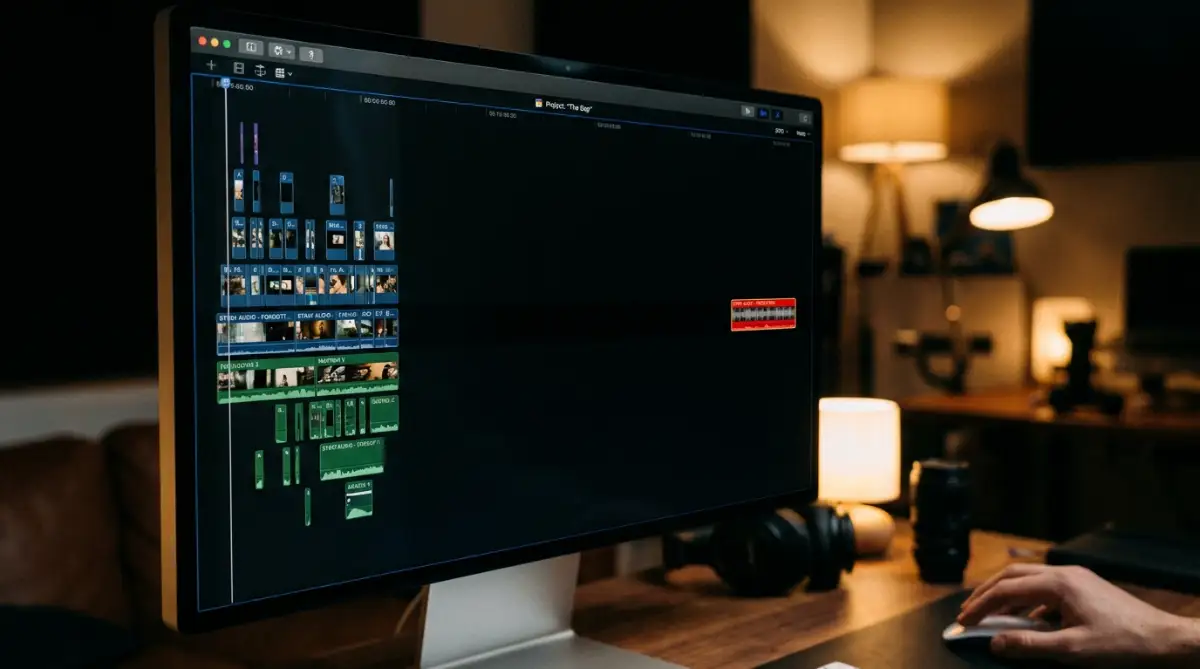
Taking just two minutes to double-check your timeline can save you hours of wasted uploading time. It is a small habit that separates amateurs from professionals.
Color Depth and Fancy Add-ons
Most editing software offers options to export in 10-bit or even 12-bit color depth. This sounds incredibly fancy, and the software often recommends it for maximum quality. Higher color depth means the file holds millions of extra color shades, preventing banding in skies or smooth gradients.
However, standard web browsers and basic computer monitors cannot even display these extra colors. They top out at standard 8-bit color. If you check the box for maximum render quality and maximum bit depth, you are blowing up your file size for details no one will ever see.
Keep your settings strictly matched to where the video is actually going. If it is going to a standard streaming site, standard 8-bit color is exactly what you need. Stop forcing your computer to work overtime for invisible improvements.
Why You Must Stop Trusting Default Settings
The biggest lesson here is that video editing software is designed to protect quality at all costs. Companies like Adobe, Apple, and Blackmagic want their software to produce the most stunning images possible. So, their default settings are always heavily skewed towards maximum quality rather than practical file sizes.
They assume you are working on a massive Hollywood server with unlimited storage space. But you are a real person, working on a regular internet connection, trying to get things done efficiently. You have to take manual control of your software to make it work for your actual lifestyle.
Creating customized export presets is the smartest thing you can do for your workflow. Once you find the perfect balance of low bitrate, smart codec, and appropriate resolution, save that setting immediately. Give it a name like "Perfect Web Upload" so you never have to guess the numbers again.
This takes the stress entirely out of the process. You can hit export with total confidence, knowing the file will be small, crisp, and ready to upload in minutes instead of days. You will get your hard drive space back, and more importantly, you will get your time back.
Next-Level Export Strategies for Serious Creators
Once you master the basic sliders in your video editing software, a whole new world of optimization opens up. We need to move beyond just lowering the resolution and start looking at how professional editors manage their massive projects. I want to share some incredibly smart habits that will keep your storage drives completely empty and your upload speeds incredibly fast.
These are not difficult technical tricks that require an engineering degree to understand. They are simply better ways to communicate with your software so it stops wasting your computer's resources.
The Magic of Two-Pass Encoding
Most editing programs give you an option for VBR 1-Pass or VBR 2-Pass when choosing your bitrate. This single setting changes exactly how the software thinks about your video. In a 1-pass export, the computer rushes through your video from beginning to end as fast as it can. It makes quick guesses about how much data is needed for each frame, which often results in a heavier file.
Choosing VBR 2-Pass completely changes the game. On the first pass, the software does not save anything; it just watches your video to analyze the complex motion and simple backgrounds. On the second pass, it carefully applies the perfect amount of compression to every single second based on its notes.
This means a completely still shot gets almost zero data, while an explosion gets everything it needs. The final file size is significantly smaller, and the visual quality is stunningly sharp. Yes, the rendering process will take almost twice as long to complete on your computer. But it will save you hours of uploading time later, making it an incredibly smart trade-off.
Just like you would spend time decoding the science behind generative visual data to get the perfect image, you must let your video software take its time to analyze your project. Patience during the export phase pays off massively.
Working with External Compression Tools
Sometimes, your main editing software is simply not the best tool for the final step. Programs like Premiere Pro or Final Cut are built for heavy editing, not necessarily for the smartest web compression. This is why many industry experts rely on dedicated encoding software to do the final squeeze.
You can export a master file from your editor and then run it through a free, open-source tool like HandBrake. The advanced video transcoding algorithms in HandBrake are specifically designed to shrink massive files without ruining the visible pixels. This extra step might sound annoying, but it gives you microscopic control over how your file is packaged.
It acts like a giant digital vacuum sealer for your media. You just drop your heavy video in, select a "Web Optimized" preset, and watch the file weight drop by another thirty percent.
Mastering the Concept of Keyframes
Inside your export menu, there is often a deeply hidden setting called "Keyframe Distance." To understand this, imagine your video is a flipbook made of hundreds of drawings. Instead of drawing every single detail on every single page, what if you only drew the things that actually moved?
A keyframe is a completely full, perfect picture saved by your software. The frames immediately after it only save the tiny details that changed from that main picture. If you tell your software to place a keyframe every single frame, your video file will become a massive monster instantly.
For standard internet videos, a keyframe distance of half your frame rate is a very safe bet. If you are editing at 30 frames per second, setting your keyframe distance to 15 tells the software to be extremely efficient. This prevents digital noise and blocky artifacts from ruining your beautiful footage.
If you set this number wrong, you might end up with weird pixelated glitches. This is very similar to the frustration of fixing deformed visual details in digital creations. You want the software to understand the structure perfectly without overworking itself.
Creating Your Personal Export Templates
The absolute best way to maintain amazing results long-term is to stop relying on your memory. You should never have to manually type in your bitrate, audio settings, and resolution every single time you finish a project. Humans make mistakes, and clicking the wrong box can ruin your entire afternoon.
Once you test your settings and find the absolute perfect balance for your social media uploads, save it immediately. Every good editing program has a button that says "Save Preset" or "Create Template." Name it something very clear, like "Small File YouTube Upload" or "Quick Client Preview."
This builds a reliable system that you can trust blindly on a busy day. Consistency is exactly what separates a stressed amateur from a calm professional. It is the exact same principle as mastering character consistency for a long-term project. You build the rule once, and let the software follow it forever.
The Heartbreaking Mistakes Destroying Your Workflow
I have seen so many talented people give up on content creation simply because the technical side became too overwhelming. The real tragedy is that they were usually just making one or two very common mistakes over and over again. These errors silently eat up your storage space, burn out your expensive computer hardware, and steal your joy.
Let us look closely at the traps you need to avoid to protect your peace of mind and your digital workspace.
The Trap of "Maximum Render Quality"
There is a very dangerous little checkbox in Adobe Premiere and other software called "Use Maximum Render Quality." Human psychology makes us want to click it. We think, "Of course I want the maximum quality, why would I choose anything less?"
This is a massive trick that completely destroys your file size for no logical reason. That specific checkbox is actually meant for high-end graphic resizing, like taking a tiny old video clip and blowing it up to fit a massive movie screen. It forces your computer to run incredibly complex mathematical equations on every single pixel to smooth out the edges.
If your original video is 1080p and you are exporting it as 1080p, clicking this box does absolutely nothing to improve your image. It only makes your computer run incredibly hot, doubles your rendering time, and adds completely useless data to your final file. Just leave it unchecked unless you are doing heavy digital scaling.
The Fake 4K Upscaling Illusion
Another incredibly common mistake is trying to make a cheap camera look expensive by faking the final export. Let us say you recorded a nice, simple video on a slightly older smartphone that shoots in standard HD (1080p). When you bring that into your software, the absolute best it will ever look is 1080p.
However, many creators will forcefully change their export settings to 4K, hoping it will magically make the video look like a cinematic masterpiece. Your editing software cannot magically create new details that your camera never captured in the first place. All it does is stretch out the existing pixels and fill the empty space with massive amounts of blank data.
You end up with a video file that is four times heavier than it needs to be, but the actual visible quality remains exactly the same. Stop trying to trick the internet with fake numbers. Be honest with your footage, export at the original resolution you recorded in, and enjoy your incredibly fast upload speeds.
Destroying Your Physical Storage Hardware
If you are constantly exporting incorrectly huge files, you are rapidly burning through the Terabytes Written (TBW) endurance limit of your SSD. One day, you will sit down to work, and your drive will just be completely dead, taking all your precious memories and client projects with it.
Managing your file size is not just about uploading to the internet faster. It is about protecting your very expensive computer hardware from premature death. A lighter file saves your processor from overheating and gives your storage drives a much longer, healthier life.
Ignoring the Audio Uncompressed Bloat
I mentioned audio earlier, but it is such a huge mistake that it needs a stronger warning. People get so obsessed with making the picture look perfect that they completely ignore the sound settings. Leaving your audio set to "Uncompressed Linear PCM" is a fantastic way to bloat your project without realizing it.
Think about a simple podcast with a static background image. The video part is tiny because nothing is moving. But if the hour-long audio is uncompressed, that file will still be shockingly massive.
Always double-check your audio tab before hitting export. Make sure it is locked into AAC format. You will never hear the difference on standard headphones, but your hard drive will definitely feel the difference. Bad audio management ruins a project just as quickly as ignoring basic lighting principles in your visual creations. Every element needs your strict attention.
Your New Stress-Free Uploading Blueprint
We have covered a massive amount of technical ground today, but the main goal is incredibly simple. You want to take your time back from the loading screens and endless progress bars. Video editing should be a fun, creative process that ends with excitement, not a stressful battle against your internet connection.
By taking just a few moments to understand what bitrate actually does, you instantly gain total control over your digital files. You now know that throwing more data at a screen does not automatically make the video better. It is about being smart, precise, and practical with your choices.
You understand how codecs like H.264 and H.265 beautifully compress your hard work so the world can enjoy it without buffering. You also know exactly which checkboxes to ignore to protect your computer from overheating.
Tomorrow morning, I want you to open your favorite editing program and completely ignore the default settings. I want you to build a custom preset using everything we discussed here. Lower your bitrate slightly, choose the right codec, uncheck maximum render quality, and run a quick test.
When you see that perfectly clear video with a tiny file size sitting on your desktop, you will feel an amazing sense of relief. Taking control of your technical skills allows you to focus purely on being creative. Updating your digital knowledge and toolkit is the single best investment you can make for your online journey.
I used to absolutely dread the moment my video finished editing because of terrible export issues. Now, I just smile, hit my custom preset, and go make a warm cup of coffee while it uploads perfectly. You deserve that exact same peace of mind, so go set up those new settings right now!
Answers to Your Biggest Video Export Questions
Does reducing the video file size completely ruin the visual quality?
Not at all, as long as you do it smartly! By lowering the bitrate slightly and using an efficient codec like H.264, you throw away useless data without touching the visible pixels. Your viewers will literally never notice the difference, but your hard drive definitely will.
What is the absolute best video format for uploading to YouTube?
YouTube heavily prefers the MP4 container paired with the H.264 video codec and AAC audio. If you want to see the exact technical requirements, you can check out the official YouTube recommended encoding settings. This specific combination is incredibly lightweight, processes lightning-fast on their servers, and maintains beautiful colors and sharpness.
Why is my very short one-minute video taking up gigabytes of space?
This usually happens because your software is exporting in an uncompressed format like ProRes or AVI, or your bitrate slider is pushed to the absolute maximum. Check your export settings immediately and switch to a standard web-delivery preset to fix this issue instantly.
Can I shrink a massive video that is already saved on my computer?
Yes, you absolutely can! You do not need to re-edit the whole project; just drop the heavy file into a free transcoder like HandBrake. Choose a simple "Fast 1080p" preset, and the software will compress the existing file into a much smaller version without issues.
Is an MP4 file always smaller than a MOV file?
Not necessarily, because MP4 and MOV are just empty digital boxes that hold your media. The actual size depends entirely on the specific codec and bitrate you put inside that box. However, MP4 is generally much more compatible across different websites and mobile devices.
Disclaimer: The information provided in this article is for educational and informational purposes only. Video editing software interfaces and features may change over time based on developer updates. Always ensure you have backups of your original media files before testing new compression settings or deleting old projects to free up storage space. We are not responsible for any accidental data loss or hardware issues.