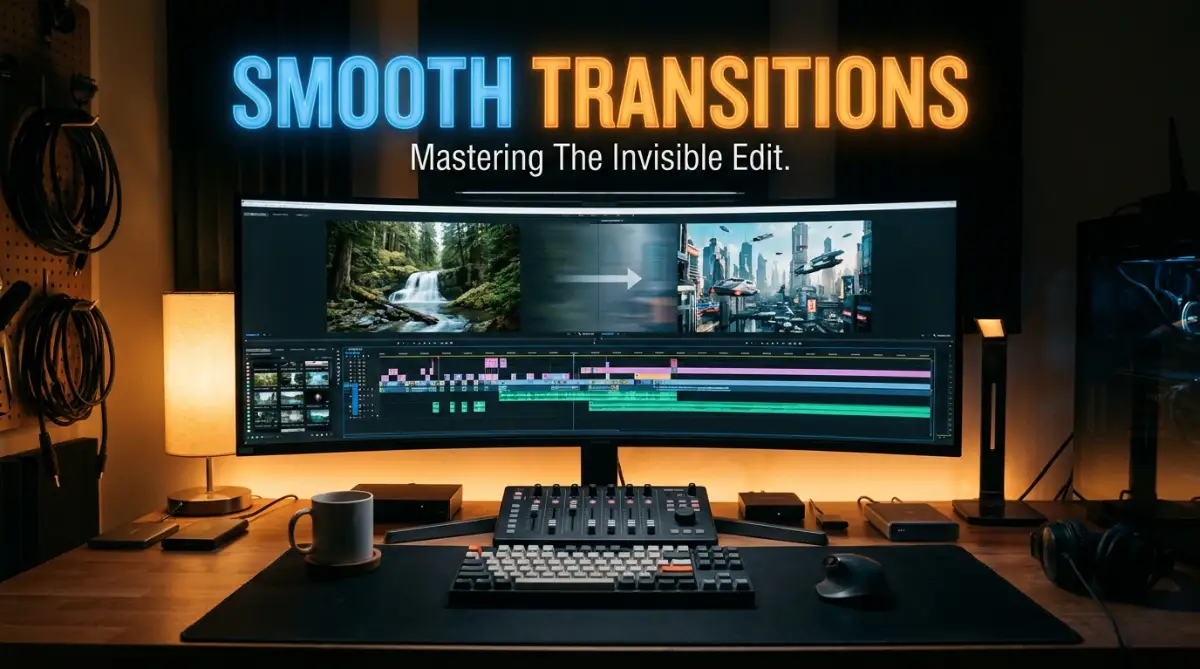
The Frustrating Reality of Choppy Video Edits
Let's be honest—nothing hurts more than dropping two perfectly good clips onto your timeline, only to realize they look terrible together. One shot is a moody, slow pan. The next is bright, shaky, and chaotic. Hitting play feels like a sudden slap in the face.
You might think you need to buy flashy transition packs or learn crazy visual effects to hide the awkward jump. But you don't. Blending totally different shots isn't about slapping a heavy digital glitch on top of the cut. It’s about learning how the human brain processes sound, motion, and color. Once you understand a few simple psychological tricks, you can make any two clips flow together naturally, without spending a dime on plugins.
But the truth is much simpler than that. Connecting totally different clips is not about throwing expensive effects at the screen. It is about understanding how human psychology works when we watch a screen.
What You Will Learn Today:
- Why sound (like J-cuts and L-cuts) hides bad visual edits better than fancy effects.
- How to use movement and "visual momentum" to connect two completely different scenes.
- The simple color grading trick that makes random clips look like they belong in the same story.
- Why proxy editing and negative space are your best friends for smooth timeline playback.
The Hidden Mechanics Behind Seamless Video Flow
Connecting completely different scenes is basically like building a safe bridge between two distant islands. If you just throw your viewer from one island to the other, they will feel completely lost. You have to guide their eyes, their ears, and their feelings so they do not even notice the jump.
This requires a mixture of visual tricks and audio magic that professional editors use every single day. Let's break down the exact steps you can take right now to make any two scenes connect perfectly.
Mastering the Art of Audio Bridges
Audio is actually more important than video when it comes to tricking the human brain. If a cut sounds smooth, your viewers will forgive a slightly awkward visual jump. This happens because our ears process a continuous flow of information naturally.
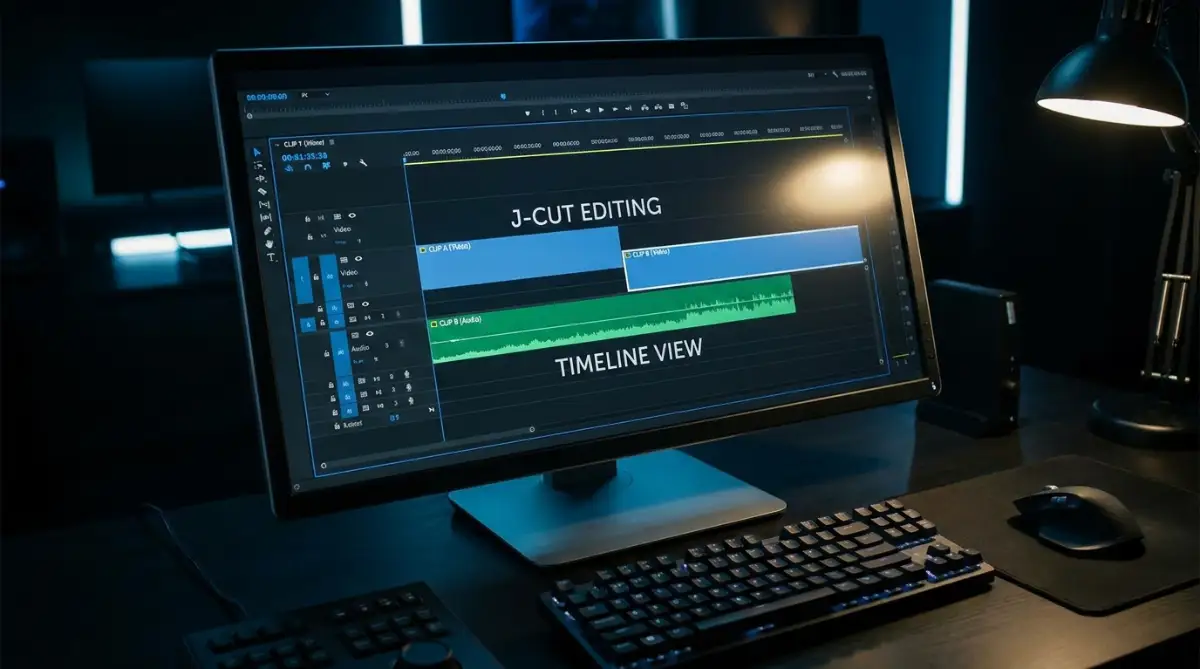
To bridge two totally random clips, you need to use sound to predict the future. This technique is widely known as a J-cut. A J-cut means the audio from your second clip starts playing while we are still watching the first clip.
Imagine you are watching a quiet scene of a girl reading a book in a library. The very next clip is a loud, crowded train station. If both the video and audio cut at the exact same second, it is going to shock the viewer.
Instead, you bring the sound of the train station into the last few seconds of the library clip. The viewer hears the distant train whistle and the footsteps while still looking at the book. Their brain subconsciously prepares for a new environment. By the time the visual cuts to the station, it feels completely natural.
I used to ignore audio mixing entirely, focusing only on how my footage looked on the screen. My edits felt incredibly amateur until I started treating sound design as my primary transition tool. Always remember that good sound design acts like invisible glue for your raw footage.
Audio Transition Cheat Sheet for Editors
To make your life easier, here is a quick breakdown of exactly when to use which audio trick:
Using Visual Match Cuts for Instant Connection
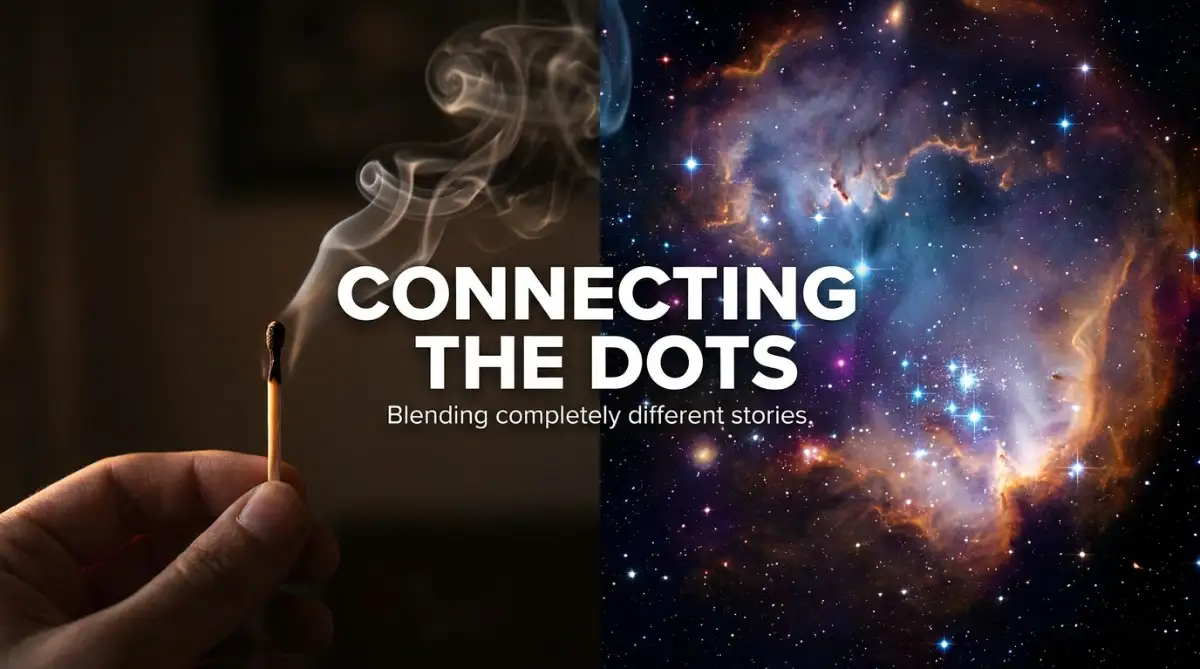
A visual match cut is a brilliant way to connect two completely unrelated subjects. You do this by matching the shape, movement, or color of an object in clip A with a similar object in clip B. The human eye loves finding patterns.
For example, your first clip might show a round, bright yellow sun in the sky. Your second clip might show a round, bright yellow egg yolk sizzling in a pan. If you cut exactly when the sun and the egg yolk are in the exact same spot on the screen, the brain accepts the change smoothly.
This method forces the viewer's eye to stay in one specific spot on the screen. They are so focused on the shape and position of the object that they barely notice the background has completely changed. You can use this trick with simple shapes, specific colors, or even shadows.
You do not need fancy AI tools to pull this off. You just need to pay close attention to your framing. Scale and position your clips carefully in your software so the main elements line up perfectly before you make the cut.
The Magic of Speed Ramping and Momentum
Motion is another incredible tool to hide a heavy edit. If your first clip has a lot of movement, you can use that energy to push the viewer right into the second clip. This concept is often called visual momentum.
Let's say your first clip is a skateboarder flying past the camera from left to right. Your next clip is a completely unrelated shot of a bird flying across the sky. If the bird is also moving from left to right at a similar speed, the transition will feel incredibly smooth.
The viewer's eye is already tracking a fast-moving object. They are naturally moving their eyes across the screen in a specific direction. You are simply replacing the object they are tracking without breaking their momentum.
You can enhance this by using speed ramping inside your editing software. You can speed up the very end of your first clip to create a blur. Then, you speed up the very beginning of your second clip and slow it down smoothly.
This creates a swoosh effect that completely masks the hard cut between the different scenes. It makes the edit feel intentional, energetic, and highly professional.

Creating a Unified Look with Color Grading
Sometimes, the biggest reason two clips feel disconnected is simply because of their lighting and color. A bright, cool-toned clip will always look terrible next to a dark, warm-toned clip. The harsh contrast shocks the eye.
To fix this, you need to apply a unified color grade to both clips. You do not have to make them look completely identical, but they need to exist in the same visual universe. Adjust your highlights, shadows, and mid-tones so they share a similar atmosphere.
If your first clip is a cold snowy mountain and your second clip is a hot desert, try pulling the colors toward a neutral middle ground. You can cool down the desert slightly or add a tiny bit of warmth to the snow. You can also add a subtle adjustment layer over your entire timeline with a specific cinematic LUT.
This single color layer acts like a blanket, wrapping all your random clips together. When the brain sees a consistent color palette, it naturally assumes all the clips belong to the same story.
I actually learned this the hard way during a freelance project a few years ago. I spent hours trying to build the perfect motion transition between a dark indoor shot and a bright outdoor shot. My client hated it until I simply adjusted the white balance and matched the contrast levels, which fixed the problem instantly without any complex effects.
Here is an expert tip for you: Always look at your waveform and vector scopes when matching colors, instead of just trusting your naked eye. Your eyes adjust to bright screens over time and will lie to you, but your software's data scopes will always tell you the exact truth about your exposure.
Quick Software Tip: If you use Premiere Pro or DaVinci Resolve, try the "Color Match" feature. You just select your bad clip, pick the good clip as a reference, and let the software do the heavy lifting. It won't be 100% perfect, but it gets you about 80% there in just one click. You can then tweak the shadows manually to finish the job.
Strategic Use of Overlays and Light Leaks
If you are dealing with incredibly stubborn footage that refuses to blend, you can use practical overlays. Things like natural light leaks, film grain, or lens flares can act as a great visual bridge.
When you place a quick burst of light right over the exact point where your clips cut, it hides the harsh edge. The sudden flash mimics a camera shutter or a natural sun flare. It gives the brain a tiny split-second distraction.
However, you must be very careful with this technique. If you use a massive, colorful light leak on every single cut, your video will look incredibly cheap and spammy. The goal is to keep it subtle and motivated by the actual lighting in the scene.
If there is a window in your first clip, bring the light flare from the direction of that window. Make the digital overlay feel like it actually belongs inside the real environment. A small dusting of film grain across both clips will also help bind the digital pixels together beautifully.
Designing an Immersive Soundscape
We already talked about J-cuts, but true audio bridging goes much deeper than that. You need to build an entirely new environment using sound effects. We call this a soundscape, and it is the secret weapon of every top-tier editor.
Let's imagine you are transitioning from a busy office space to a quiet forest. You cannot just cut the office noise abruptly. You need to add an audio riser, a subtle wind swoosh, or a low-frequency hum right at the transition point.
These specialized sound effects create a sonic curve. They pull the viewer's attention slightly away from the raw dialogue or background noise. A deep bass drop or a soft whoosh acts like an audio curtain closing and opening again.
You can easily find these sound effects in almost any creator library today. Layer a few different sounds together to create something totally unique. Add a bit of reverb to the end of the office sound so it echoes naturally into the quiet forest scene.
Breaking Down Common Editing Myths vs. Reality
There are a lot of bad pieces of advice floating around the internet about video editing. Let's clear up some common misunderstandings about making smooth transitions.
By understanding these realities, you will save yourself hours of unnecessary rendering time. You will stop relying on drag-and-drop transitions and start thinking like a true storyteller.
Why Empathy is Your Best Editing Tool
Does the edit make you feel confused for even a fraction of a second? If it does, you need to go back and adjust the timing. Maybe you cut exactly on a heavy drum beat, but the visual action happens a second later.
Fixing that timing is essential for a good user experience. You want to make sure your audience never has to work hard to understand what they are watching. The best video editing in the world is completely invisible.
Creating a Visual Setup Before the Cut
You can also use text, graphics, or a narrator to set up a totally unrelated scene. If you tell the viewer exactly where they are going, they will accept the most random visual jump.
If your presenter on screen points to the left and says, "Let's look at the data," you can cut to literally anything on the left side of the screen. The viewer's brain is already primed and waiting for new information.
This is why news broadcasts can jump from a studio anchor to a live street reporter so easily. The context provides the bridge. You are using the power of expectation to mask the visual difference.
Always give your viewers a tiny breadcrumb to follow before you pull them into a new world. Whether it is a hand gesture, a spoken word, or a simple graphic pointing off-screen, that little hint makes all the difference.
When you combine all these elements—audio bridges, color matching, movement, and context—you become unstoppable. You can take the most random, messy folders of footage and turn them into a masterpiece. You will never have to stare blankly at your screen at 3 AM again, wondering why your project feels broken.
(To learn exactly how to apply these audio tricks inside your software step-by-step, watch this incredible tutorial below that breaks down the entire process simply.)
Harnessing the Power of Intentional Pauses
Sometimes, the best way to transition between two unrelated clips is to just stop completely. Instead of trying to force a connection, you give the viewer a moment to breathe. This is a highly effective pacing technique used in documentary filmmaking.
You can fade your first clip completely to black for just one or two seconds. Let the audio completely fade out as well. This creates a tiny chapter break in your video.
When the screen goes dark, the viewer's brain hits a reset button. They subconsciously understand that the previous thought is over, and a new thought is about to begin. When you bring up your totally unrelated second clip from the black screen, it feels completely natural.
You should only use this technique when moving between major sections of your story. If you fade to black every ten seconds, your viewers will think their screen is broken. Use it sparingly to create dramatic impact and separate completely different moods.
Final Tweaks for Perfect Playback
Once you have applied your sound design, matched your colors, and found the perfect cut point, you need to review your work properly. You must play the sequence back multiple times without looking directly at the center of the screen.
Look slightly away from your monitor while the transition happens. If your peripheral vision catches a harsh flicker or a sudden weird flash, your cut is still too rough. You want the transition to feel like a gentle wave, not a sudden speed bump.
Try dropping the overall volume of your timeline by fifty percent. When the audio is super quiet, your ears become highly sensitive to sharp audio pops or unnatural sound changes at the cut point.
Editing is simply a game of patience and small adjustments. Moving a clip just one single frame to the left or right can completely change how a transition feels. Trust your instincts, keep your timeline organized, and always prioritize the viewer's comfort above flashy software tricks.
Next-Level Strategies for Invisible Edits
Once you understand the basic mechanics of connecting different scenes, it is time to level up your timeline. Professional editors do not just slap two clips together and hope for the best. They build a psychological bridge that makes the viewer feel completely comfortable.
To maintain high-quality results across every project you create, you need to develop a solid editing system. This system will save you from staring at a messy timeline feeling completely overwhelmed. Let's look at some advanced techniques that will completely change how you approach your video projects.
Mastering the Rule of Six
Have you ever wondered why Hollywood movies feel so incredibly smooth, even when they jump between completely different locations? This happens because top editors follow a specific set of psychological rules. The most famous one is known as the Rule of Six in film editing, created by legendary editor Walter Murch.
According to this rule, emotion is the single most important reason to make a cut. If your first clip shows a person looking totally shocked, the very next clip must explain why they are shocked. You are using human emotion as the ultimate transition tool.
When the audience is emotionally invested in the story, they do not care if the lighting or location changes abruptly. Their brain is too busy processing the feelings on the screen. Always ask yourself if your cut serves the emotion of the story before you worry about fancy visual effects.
The L-Cut Audio Trick
Earlier, we talked about using a J-cut to bring audio from the next clip in early. The opposite of this is the L-cut, and it is equally powerful. An L-cut means you keep playing the audio from your first clip even after the visual has changed to the second clip.
Imagine someone is telling a deeply emotional story in a talking-head interview. Instead of keeping the camera on their face the entire time, you cut to a completely unrelated shot of an empty street. However, their voice continues to play smoothly underneath the new visual.
This technique completely removes the harsh feeling of a visual jump. The continuous voice gives the viewer a sense of safety and direction. You are essentially holding their hand through the audio mixing process while showing them something brand new.
Correcting Extreme Lighting Differences
One of the biggest headaches you will face is trying to connect a very bright clip with a very dark one. The sudden flash of light will hurt your viewer's eyes and make them instantly click away. You cannot always fix this with a simple color grade.
When dealing with extreme lighting shifts, you need to find a creative middle ground. Sometimes, adding a quick digital shadow or a slow fade over the bright clip can soften the blow. Just like how you want to avoid ruining your digital art with bad lighting, you must protect your video viewer from harsh visual changes.
You can also use natural objects in the frame to hide the brightness. If a car drives past the camera, creating a momentary dark shadow, make your cut right at that exact moment. Use the natural environment to mask the sudden change in exposure.
Creating Visual Consistency Through Subjects
When you are pulling random clips from stock websites, they rarely feature the exact same people or objects. This lack of consistency makes the video feel incredibly disjointed. However, you can trick the eye by matching the visual weight of the subjects.
If your first clip features a large object on the right side of the screen, make sure your second clip also has a large object on the right side. The object itself does not matter at all. It could be a mountain in the first shot and a skyscraper in the second shot.
The human eye is already resting on that specific part of the monitor. When the cut happens, the eye does not have to dart across the screen to find the new subject. This is very similar to how digital creators work hard to master character consistency across different images.
Using Proxies for Perfect Timing
You cannot judge a smooth transition if your editing software is constantly lagging and dropping frames. High-resolution footage often chokes older computers, making playback incredibly choppy. You might think your cut is terrible, but the real problem is just your computer struggling to keep up.
To fix this, you must learn to edit using proxy files. Proxies are basically low-quality, temporary copies of your heavy video files. Your software uses these light files while you edit, allowing your timeline to play back like absolute butter.
When you have perfectly smooth playback, you can feel the true rhythm of your edits. You can adjust your cuts down to the exact micro-second. Once your project is finished, the software automatically replaces the proxies with the original high-quality files for the final export.
Embrace the Concept of Negative Space
We often feel pressured to fill every single second of our videos with fast movement, loud music, and flashy text. This is a massive mistake. If you want a hard transition to feel impactful, you need to surround it with calmness.
Think about a loud explosion in an action movie. That explosion feels much bigger if the scene right before it was totally silent. This is the concept of negative space in audio and pacing.
Give your audience a moment of quiet before jumping into a chaotic, unrelated clip. This brief moment of silence resets their sensory expectations. By controlling the pacing, you control how the viewer experiences the sudden change in scenery.
The Hidden Traps That Ruin Your Edits
Even with the best tools and techniques, it is incredibly easy to fall back into bad habits. Editing is a mentally draining process, and when we get tired, we make poor decisions. Let's look at the most dangerous pitfalls that will instantly expose your project as amateur work.
Relying on Default Software Transitions
When we feel totally stuck on a hard cut, we often panic. We open up the default effects folder in our software and grab a simple cross-dissolve or a flashy star wipe. We slap it between the two unrelated clips, hoping it will magically solve the problem.
This almost never works. A lazy cross-dissolve between two totally different scenes looks like a cheap slideshow from a corporate meeting. It completely kills the energy of your video and shows the audience that you did not know how to handle the cut properly.
Instead of relying on digital bandaids, force yourself to figure out a story-based reason for the cut. Use sound, motion, or emotion to guide the viewer. Leave the default transitions alone unless you have a very specific, artistic reason to use them.
Ignoring the Background Audio Room Tone
One of the quickest ways to ruin a smooth edit is by forgetting about room tone. Every single location in the world has a unique background noise. A quiet bedroom sounds totally different from a quiet parking garage because of how the sound waves bounce around the space.
When you cut two unrelated clips together, the background room tone suddenly shifts. Even if nobody is talking, the viewer's ears will instantly pick up on this unnatural change. It feels like all the air was just sucked out of the room.
To avoid this, you must always bridge the gap with consistent audio. You can use an audio equalization tool to remove harsh frequencies and blend the two background noises smoothly. This single step will make your video feel incredibly polished and highly professional.
Forcing a Cut Where It Doesn't Belong
Sometimes, two clips are just never going to work together smoothly. They have completely opposite energies, clashing colors, and confusing camera angles. No matter how many tricks you try, the transition will always feel awkward and forced.
When you run into this problem, you have to be brave enough to kill your darlings. Stop trying to force a square peg into a round hole. You are wasting hours of your life trying to save a bad combination of shots.
Instead, go find a third clip to act as a visual stepping stone. Find a shot that shares the energy of the first clip and the color palette of the second clip. Dropping a quick b-roll shot in the middle can completely fix a broken sequence in seconds.
Overlooking Visual Artifacts and Glitches
When you apply heavy color grading or speed ramping effects to mask a transition, things can get messy. You might start seeing weird digital noise, blocky pixels, or strange edge lines in your footage. These are called visual artifacts.
Viewers today have highly trained eyes, and they will immediately notice these digital mistakes. It makes your work look sloppy, much like when creators struggle to fix deformed features in digital art generation. You must always watch your final transition frame by frame.
If you see ugly artifacts appearing during the cut, you need to dial back your effects. Reduce the intensity of your color grade or slow down your speed ramp just a tiny bit. A clean, simple cut will always look better than a highly processed, glitchy transition.
Rushing the Final Timeline Review
The biggest mistake you can make happens right at the end of the process. You have been staring at the same timeline for eight hours straight. Your eyes are tired, your ears are ringing, and you just want to hit the export button and go to sleep.
When you rush the final review, you miss tiny mistakes that ruin the viewer's experience. You might leave a single frame of black space between two clips. You might forget to fade out a heavy sound effect, causing a massive pop in the speakers.
Always step away from your computer for at least thirty minutes before your final review. Go for a walk, drink some water, and clear your head. When you come back and watch the video with fresh eyes, you will instantly spot the awkward transitions that need fixing.
The Blueprint for Flawless Video Storytelling
Let's do a quick recap of your new action plan: Always prioritize sound design to prepare the viewer's ears before you change the visual. Use match cuts and motion momentum to keep the eyes focused exactly where you want them. Never rely on cheap, default software effects to hide a badly timed cut.
Remember that editing is a highly psychological game. If you pay attention to the lighting, the room tone, and the emotional pacing, your viewers will feel completely immersed in your story. They won't even notice the hard work you put in, and that is exactly the point.
When you run into technical issues with your creative software, don't let it stop you. Whether you are figuring out why your digital outputs look completely blurry or struggling with timeline lag, patience is your best friend. Every problem has a logical solution if you take the time to break it down step by step.
The most beautiful videos on the internet are often made from completely unrelated, chaotic pieces of footage. It is your job as the editor to find the hidden thread that connects them all together. Once you master this skill, you can tell literally any story you want to tell.
If you are looking for even more digital strategies and software tutorials, I highly recommend exploring our main platform here for detailed guides. We are constantly breaking down complex digital workflows into simple, bite-sized steps that anyone can follow.
I know exactly how frustrating it feels to stare at a broken timeline, wanting to pull your hair out. But I promise you, once you start applying these simple psychological tricks, editing will become your favorite part of the process. My biggest advice is to just start experimenting today—throw two totally random clips together and see if you can trick your own brain into believing they belong together!
My Final Piece of Advice:
If you feel overwhelmed by all these editing rules, do not panic. Pick just one technique today—like the J-cut—and try it on two completely random clips on your phone. You will be amazed at how quickly your brain catches onto the rhythm. Editing is a muscle, and the more you practice these small psychological tricks, the stronger your storytelling will become.
Common Questions About Video Editing Transitions
What is the easiest way to connect two very different clips?
The absolute easiest way is to use a J-cut. Simply let the audio from your second clip start playing a few seconds before the video actually changes. This prepares the viewer's brain and makes the sudden visual change feel incredibly smooth and natural.
Why do my video transitions always look so choppy and amateur?
Choppy edits usually happen when you ignore the natural pacing and motion of the footage. If the first clip has fast camera movement and the second clip is completely still, the sudden stop shocks the eye. You always need to match the energy levels of both clips to maintain a good flow.
Should I use cross-dissolves to hide bad cuts?
No, you should avoid using cross-dissolves just to hide a mistake. Overusing basic transitions makes your project feel slow and unprofessional. It is always better to find a creative way to cut directly, using sound design or a quick b-roll shot to bridge the gap.
Can color grading really help connect unrelated videos?
Yes, color grading is incredibly helpful for connecting random footage. By applying a similar contrast level and a unified color tone to both clips, you trick the brain into thinking they belong in the same environment. It acts like a visual glue that binds the entire timeline together.
How do I practice making better video cuts?
The best way to practice is to turn off the audio on your favorite movies and just watch the visual cuts. Pay close attention to exactly where the editor decided to change the scene. Then, open your software and try to replicate that exact timing with your own random footage.
Disclaimer: The information provided in this article is for educational and informational purposes only. The strategies, techniques, and software practices mentioned are based on personal experience and industry standards. We do not guarantee specific audience retention rates or financial success from applying these video editing techniques. Always ensure you have the proper licenses and rights to use any audio, video clips, or sound effects in your projects. Please adhere to the content policies of Google, YouTube, Facebook, Pinterest, and other social media platforms when publishing your final edited videos.